Showing posts with label gridwargaming. Show all posts

Sunday 24 October 2021

Moving Waggons and Arcs of fire.

 When writing a set of instructions for Wargaming you like to think you have covered all the angles but it is very rarely the case.

Some waggon models are to long to put on a single stand. Therefore, the waggon has to go on one stand and a team of horses on another. The two must be in adjacent squares.

Here is an instruction should you wish to use it.

1) Move the horse stand in the direction of travel .

2) Move the waggon up to the adjacent square behind the horses. 

3) Reversing the direction of travel. Reverse the horse stand. Move the horse stand one square ( on top of the waggon), then a further square. Movement of the horse stand then stops.

4) The waggon is then reversed on the spot to match the direction of the horses.


5) On the next movement phase of the next Game-Turn the Waggon moves as normal.

All this sounds a bit convoluted but in real life if enough room was available you can turn a waggon team around but as with a car so with horses.

This is reflected in the fact that when the horse stand is reversed over the waggon. It can only be moved two squares instead of the normal four.

There must be two squares vacent for the horse's and wagons to move. If using this system, it stands to reason that without the horses in an adjacent square to the front, the waggon ( or gun ) cannot move!.

The above instruction allows for horse teams within the restricted space of a small wargame table. The same instruction could be used should you wish to use limber teams on a separate stand from artillery pieces.

ARCS OF FIRE.

A stand has a 90% arc of fire to its front. If there is an object, or a friendly stand in the adjacent square to the front the stand is blocked from firing even on the diagonal.

The above picture shows a confederate infantry stand unable to fire even on the diagonal because the adjacent front square has woodland in it.

The next picture shows the same confederate stand. This time, after movement, the stand has been left with an open space in the front adjacent square. This means that it can fire on the diagonal at the Union infantry within its 90% arc of fire


The facing of the stand is very important at the end of its intended move, and could leave the stand at a disadvantage if not attended to!

The waggon and team is Peter Pig. The figures are Peter Pig and Miniature Figurines. The Union gun and crew is Peter Pig.


Saturday 23 October 2021

Battle of Dranesville; Fairfax County, December 20th 1861.

The details in this blog are my personal interpretation of  historical events. any mistakes are my own. Most of the detail I gained from Wikipedia. I had to do a bit of digging on the net for the regiments that were present but I cannot guarantee the accuracy of the list I have presented.
 
 This action was preceded by a reconnaissance and foraging operation from Centreville moving north, led by the Confederate General J. E. B. Stuart. At about the same time, General Ord of the Union army was moving his Corps east, along the south bank of the Potomac River to clear any Confederate forces from Loudon and Fairfax County.

Ord left half his Union force [ 5,000 ] at Colvin Run Mill so that he would not be outflanked. Neither force was aware of the other until both forces reached the area  south east of Dranesville. General Ords force, having driven off some Confederate cavalry piquets, was just resuming the march eastward when Jeb Stuarts force was encountered coming from the south.


UNION ARMY, 5,000 = 5 pts x 5 = 25 pts.

1 General and C-in-C [ Edward Otho Cresp Ord ] @ 1 point.
1 General [Lt Colonel Thomas Kane ] @ 1 point.


13th Pennsylvania Infantry = 2 stands of 2nd class Line Inf @ 2 pts = 4 pts.
6th Pennsylvania Infantry = 2 stands of 2nd class Line Inf @ 2 pts = 4 pts.
10th Pennsylvania Infantry = 2 stands of 2nd class Line Inf @ 2pts = 4 pts.
12th Pennsylvania Infantry = 2 stands of 2nd class Line Inf @ 2pts = 4 pts.
9th Pennsylvania Infantry = 2 stands of 2nd class Line Inf @ 2pts = 4 pts.
The Rearguard Infantry = 1 stand of 3rd class Skirmish Infantry @ 1 point.

1st Pennsylvania Cavalry = 1 stand of 3rd class Cavalry @ 1 point.
Battery A,  Hezekiah Easton. = 1 stand of Light Artillery @ 1 point.

CONFEDERATE ARMY, 3,800 = 3.8 pts x 5 = 19 pts.

1 General [ James Ewell Brown Stuart ] @ 1 point.

11th Virginia Infantry = 3 stands of 3rd class Line Inf @ 1 point = 3 pts.
1st Kentucky Infantry = 2 stands of 2nd class Line Inf @ 2 pts = 4 pts.
10th Alabama Infantry = 2 stands of 2nd class Line Inf @ 2 pts = 4 pts.
6th South Carolina Infantry = 2 stands of 2nd class Line Inf @ 2pts = 4pts.

1st Carolina Cavalry Company = 1 stand of Cavalry @ 1 point.
Company C, 2nd Virginia Cavalry = 1 stand of Cavalry @ 1 point.

Georgia Battery, Sumter Flying Artillery = 1 stand of Light Artillery @ 1 point.

Here are the opposing armies ready for battle;


Notes;

 * You may wish to supply Dismount Markers for the Cavalry. If so, they have no points value, a basic die is rolled for the stand when firing or in combat.

* With regard to the Light Artillery, I dont know if these Batteries had the equipment to be true Horse Artillery given supply problems of the armies in the west. Therefore these guns can only move two squares in any direction.

* You can use the "Regimental" style movement I set out in a previous American Civil War blog or, if desired move the stands individually as normal. I have read that formations suffered from a lack of senior Officers which led to confusion within and between friendly units during a battle. More often it was down to the individual bravery of soldiers on both sides that would lead to the success or failure in battle.


The battle;

* The Confederates move first and fire first on the first Game-Turn.

* From Game-Turn 2 until Game-Turn 8, both sides will throw a die to determine who gets the Initiative Point for that Game-Turn.

* If you play this Game solo it’s best to stick with the basic 2-player Game-Turn sequence.

* As this battle is in the Western Theatre all ranges are for smoothbore weapons. Again I am basing this assumption on supply problems.

* The winner after eight Game-Turns, will be the side that suffers the lower casualties. Once both sides discovered each other, neither side was prepared to back down, although the Confederates did so after their waggons were safely away.


* If the Confederates loose the higher number of stands they can force a draw if they can get a waggon into Dranesville and back to the Confederate base line by the end of Game-Turn 8.

* As you can see in the battle set-up picture above, the waggons are off the road. The waggons can start their move from the first two squares at the Confederate base edge. The waggons cannot move through wooded areas.

CREDITS;

The figures are a mix of mostly Miniature Figurines and Peter Pig with some Essex Miniatures. The waggons are Peter Pig.

The buildings are Peter Pig. The hills were made by Brian at Essex Miniatures. Two are home made.  Most of the wood 0utline bases are from S and A Scenics. The trees are from various manufacturers. The roads are made from thin cardboard.


The square figure stands are made from picture framing cardboard. The round mdf command stands are made by Minibits.


Friday 17 September 2021

Battle of Campo Santo, Modena, North Eastern Italy, February 1743.

 This is my personal interpretation of events,  any inaccuracies are my own.

The information on this battle is a bit sparse, at least in the english language. The events took place during the War of the Austrian Succession. Having previously lost parts of Silesia to the Prussian King, Maria Theresa the Austrian Empress was casting around for redress and Italy caught her attention.

In the Regal "swopmeet" that took place after the Spanish Succession  war, the Spanish gained southern Italy. This area combined with the island of Sicily became known as " The Kingdom of the Two Sicilies". This  Kingdom was ruled by King Carlos the 3rd who happened to be the eldest son of Philip the 5th and Elizabeth Farnese of Spain.

Elizabeth also wanted a Kingdom for her younger son the Infante. The former Farnese territory of Palma and Piacenza were already controlled by Austria. Tuscany looked vulnerable as did parts of  Piedmont, tucked up in the North Western corner of the peninsular. Piedmont was already under pressure from France and in the end cast its lot with the Empress.


Charles Emmanual  of Piedmont was a soldier king much like Frederick of Prussia and a wily politician to boot. The French and Spanish monarchies had family as well as political ties but there was no strategic unity. The French government would not allow passage of the coastal route to Italy by any Spanish army.

Thus it was that the Spanish fleet in avoiding  English warships managed to get an army into Genoa.

The Duke of Modena, Ferdinand the 3rd D,Este also sided with Spain when the Austrians prematurely invaded the Duchy.

By 1743 the war in Italy was bogged down. The Spanish army under De Gages kept trying to cross the Panaro northward into Modena. Traun, the Austrian commander managed to stonewall the Spanish General each time.

Both Generals were under extreme pressure by their respective governments. De Gages had three days in which to achieve a victory or he would be sacked. Traun was under a similar threat.

Eventually De Gages was able to stymy the Austrian/Piedmontese army enough to get across the Panaro, using pontoon bridges close to the village of Campo Santo.

Note;

 I  could not find an exact composition of  the Austrian/Piedmontese army but fared better with the Spanish. There is still an element of guesswork involved.

The Spanish suffered from an almost complete lack of artillery in Italy, with the Austrians only doing slightly better. Remounts for the cavalry were also a problem and it was not unusual for the Spanish to have a regiment with an entire Squadron of  troopers dismounted. 

With desertion and sickness being another major problem, along with the harshness of the terrain, De Gages used a "rule of thumb" that each infantry battalion  held 350 men with 120 troopers in a squadron.


AUSTRO-PIEDMONTESE ARMY;

9,100 infantry = 9.1 x 3 = 27 points.

2,400 cavalry = 2.4 x 3 = 7 points

25 guns + 750 gunners = 0.750 x 3 = 2 points.

1 General [ Traun ] C-in-C  @ 2 points.

1 General [Schulenburg ]   @ 1 point.

4 stands of Grenzer Light Infantry @ 1 point =4 points.

1 stand of Grenadier Line Infantry @ 3 points.

4 stands of Austrian Line Infantry @ 2 points  = 8 points.

1 stand of Austrian Hussar Light cavalry @ 1 point.

2 stands of Cavalry @ 1 point = 2 points.

1 stand of Dragoon Cavalry  @ 1 point.

2 stands of Light Artillery @ 1 point = 2 points.

PIEDMONTESE ARMY;

1 General [ Leutrum ] @ 1 point

1 General [ Aspremont ]  @ 1 point.

2 stands  of Dragoon Cavalry @ 1 point = 2 points.

1 stand of Vaudois Light Infantry Militia @  2 points

1 stand of Grenadier Line Infantry  @ 3 points

2 stands of Line Infantry @ 2 points = 4 points.

--------------------------"-----------------------------

SPANISH-NEAPOLITAN ARMY;

11,550 Infantry = 11.550 pts x 3 = 35 points r/u.

1,440 Cavalry = 1.440 pts x 3 = 4 points r/d.

12 Guns + 360 gunners = 0.360 pts x 3 = 1 point.

1 General [ De Gages ]  C-in-C  @  1 point.

1 General [ De Atrisco ] @ 2 points.

1 General [ Beaufort ] @ 1 point.

1 General [ McDonald ] @ 1  point.

1 stand of Spanish Light Infantry @ 1 point.

2 stands of Walloon Line Infantry  @ 2 points = 4 points.

2 stands of Castile Line Infantry @ 2 points = 4 points.

2 stands of Spanish Guard Infantry @ 3 points = 6 points.

2 stands of Irish Line Infantry @ 2 points = 4 points.

2 stands of Neapolitan Swiss Guard Infantry @ 2 points = 4 points.

2 stands of Genoese Line Infantry @ 2 points = 4 points.

1 stand of Modena Line Infantry @ 2 points.

1 stand of Neapolitan Light Infantry ( the famous Albanians. This was an elite unit. No deserters were allowed within its ranks.) @ 1 point.

3 stands of Spanish Cavalry @ 1 point = 3 points.

1 stand of Neapolitan Cavalry @ 1 point.

1 stand of Neapolitan Light Artillery @ 1 point.


Note. The Spanish regiments on the left were Provinciale troops. Although classed as Militia they were trained as the Line. Both Spain and Naples had single battalions of these troops. I have some stands of figures with  Modena and Genoese flags so these were put into the line as Provinciales!

Historical  Playing notes;

Traun had moved his army sideways  to the North-east to give him a  slight superiority on his left. both sides massed  their  cavalry on the Eastern flank. The cavalry of both sides fought their own private battle.

The Spanish cavalry although smaller in numbers managed to overrun the Austrian cavalry therefore, any die thrown for a Cavalry stand in the Spanish army will have one additional point added.

Cavalry cannot engage in combat with any opposition infantry.


On the western side of the battlefield the Austrian Grenz Light troops never moved from the vineyard they were ensconced in. Apparently the Grenz managed to stop the advance of the Spanish left flank. Therefore, the vineyard counts as a trench, and the light troops are not allowed to move from that position unless forced by a “move-back” result.

The area was covered in irrigation ditches, therefore cavalry can only move three squares instead of four.

Neither the river Panaro  or the Canal can be crossed except at the pontoon bridges. The pond cannot be crossed by any stands. Any stands forced into the rivers will be counted as casualties.

The two Generals were completely opposite in their command style. Gages stayed where he was for the entire battle. Traun was everywhere and he had two horses shot from under him. Therefore De Gages cannot move from his position for the entire battle


The figure representing Traun can be moved anywhere. If Traun becomes a casualty, the figure is moved back two squares and reinstated.

Casualties in this battle were very high for both sides.


● The battle will last for eight Game-Turns.

● The Austrians get the Initiative Point and will move and fire first on the first Game-Turn. Thereafter, both side will dice to see who goes first and has the Initiative Point.

●The winner will be the side losing the least number of stands after 8 Game-Turns.

The figures are a mix of Miniature Figurines, Peter  Pig and Essex Miniatures. The buildings are all scratch-built as are the pontoon bridges.

The trees are from various manufactures. The field bases are from S and A Scenics. The road and river sections are made of thin card.

The square stands are made from picture framing cardboard. The round 40mm mdf bases were purchased from Minibits.

The flags were made from masking tape and hand painted.


Final Word;

The Genoese had  a red vertical cross on their flag which was the origin of the flag of England. Modena had a blue vertical cross. Both were on a white background.


Naples, had a large vertical Maltese style cross with the same symbol repeated in each quarter again on a white background.


Piedmont,s flag was a red circle with a white vertical cross imposed on it. This circle was imposed on a black eagle. This symbol sat on a blue background.


Friday 13 August 2021

The 5th Century in Britannia Part 6; Arthur The Warlord.

 As before, this is my interpretation of events in this era as a wargamer

484AD ; Ambrosius has been buried in the old amphitheatre at Caerleon. At the Winter Solstice, all the Nobles are gathered in the former headquarters building of the Legionary fortress. They are there to decide who will be the next Pendragon. Some of the Kings have been lost by feud or by natural death. The current leaders are;

Dumnonia ; Geraint Llyngesic [ 480 to 514AD ] " The Fleet Owner",his son Cadwy.

Gwynedd ; Einon [ 500AD ] with his sons Cadwallon and Owain.

Powys ; Cadell [ 500AD ] with his son Cyngen.

Alclud ; Cinuit  [480 to 485AD ] who will be succeeded by his son Tutagual.

Gwent ; Iddon Ap Ynyr [480 to 490AD] with his son Caradog.

Note; Although Carleon is in Gwent, King Iddon has his own stronghold at Carwent. Carleon is regarded as an army base, as it was when the Legions were present.

As before, the asssembled Nobility cannot agree as to whom is to lead them. The one person who has any influence, Merlin Aurelianus is bought before the assembly. He is neither Druid or of the Church. However the 59 year old has deep knowledge. He was given his cognomen by Ambrosius. The question is put to Merlin. Who will be Pendragon?. After a moment of thought, he gives his answer;

ARTHUR.

The chamber explodes in a babble of angry voices. Merlin raises his hand and all goes quiet. Merlin reminds them that Arthur Ap Uthyr Ap Constantine was born out of Wedlock. He is not related by bloodline to any Royal House. If Arthur prevails against the Seaxons, the Dal and the Picts, all will share in his glory. If Arthur fails, no Royal House will be condemned.

The next question is of the Army. All Merlin will say is that the Army will be ready. In his mind Merlin knows the outcome of the battle between the Red and the White Dragon.


485AD; As this year progresses to April, a number of incidents happen which although not connected, will have a major influence on the future.

* In Gallaecia, Riothamus has a major problem. Hermeric, the elected High King is Aryan. He issues an Edict that all Catholics must convert or face exile. By April, 9,500 Suebians are crammed aboard 80 ships heading North to Totnes in Dumnonia.

*Hispania is almost a Visigothic Kingdom. Euric has died and has been succeeded by his son Alaric the 2nd.

* At the same time Clovis who has succeeded his father Childric the 1st, as King of the Franks moves to Paris ready to invade Soissons.

* At the end of March 485AD, at Caerleon, in front of the Army veterans the 18 year old Arthur is raised on a shield and proclaimed as Pendragon.

* In Amorica [ Brittany ] Budig the 2nd [ also known as Emyr Llydaw] is not only King of Cornouaille but also High King of Amorica. His son Riwal Mawr becomes one of Arthurs officers.

By the end of April 485, the ships carrying the Suebians reach Dumnonia. Geraint assembles his troops but the men are stood down when sprigs of leaves are seen tied to the prows of the approaching armada.

Soon Riothamus meets with Arthur, Merlin and King Iddon. The Suebians are allowed to settle around Glevum and along the River Severn with their families. The language of the Suebians is close to the Brythonic-Celtic spoken by the Britons. These new settlers become known as the "Hwicce" or "the friendly ones".

By May of 485AD, frontier raiding has been resumed between the Britons and Seaxons. Arthur wants to lead a major expedition into eastern Britannia to disrupt the continuing arrival of Seaxon settlers. However Merlin urges caution. The army is not confident in its new leader and the loyalty of the Kings is suspect.

From May to December 485AD, there are no major battles. The Navy of sixty ships commanded by Geraint patrol the West coast preventing raids by the Dal. There are still Briton communties in the south-east but they must survive on their own.

During this time,  the army is trained up with recruits from the Suebians. Riothamus is now to elderly to lead his people. He elects Rogatainus as a new leader. The Army that Arthur is to lead is of 5,000 men.

1,200 Veteran infantry in 4 cohorts of 300 men.

400 Light Archers in 2 cohorts of 200 men.

500 Elite Cavalry in one cohort.

400 Regular light Cavalry in one Cohort.

2,000 Hwicce infantry in 10 cohorts.

200 Hwicce light archers in one cohort.

300 Hwicce Light cavalry in one cohort.

The five Commanders are; Arthur [  The Pendragon], Medreut, Owain, Cadwy and Rogatainus.

note; 300 Suebians are given to Merlin as his Hearthguard.

March 486AD; The senior leaders of the Seaxons hold their Witan in Londene [London]. In the previous two years another 20,000 Jutes, Angles and Saxons have landed at points along the eastern and southern shoreline of Britannia. Food, shelter and donatives to pay their hearth troops were a priority for these leaders.

For Aelle,Bardulf, Colgrin and Osla there was only one option. Take the fight to the Wallisch. This time the Seaxons decide on different targets. Bardulf and Colgrin are taking their warbands North-west across the river Trent. Aelle and Osla want to attack westward along the Tamesis using the Akeman Street route.


Aelle has 3,800 warriors amongst the Jutes.

Bardulf and Colgrin can call upon 6,000 Saxons.

Osla has 4,800 Angles.

some of these warriors will be left to guard settlements.

April 486AD; A messenger gallops into Caerleon. The South Seaxons are on the move once more toward the Glyme. The horns are sounded. The army is assembled.

This time Aelle and Osla lead their Warbands further South from the site of the previous battle.


2nd Battle of the River Glyme, May 486AD.

The Seaxon Army; 6,500.

Aelle; 2,800 Jutes = 2.8 x 10 = 28 points.

1 General [Aelle] @ 2 points.

12 stands of Warriors @ 2 points = 24 points.

2 stands of Light Archers @ 1 point = 2 points.


Osla; 3,700 Angles = 3.7 x 10 = 37 points.

1 General [Osla ]  @ 1 point.

17 stands of Warriors  @ 2 points = 34 points.

2 stands of Light Archers @ 1 point = 2 points.


The Briton Army; 5,000 = 5.0 pts X 10 = 50 points.

1,200 Regular Infantry = 1.2 pts x 10 = 4 stands @ 3 points each = 12 points.

400 Light Archer Infantry = 0.4 pts x 10 = 4 stands @ 1 point each = 4 points.

500 Elite Clibanarii Cavalry = 0.5pts  x 10 = 1 stand @ 3 points + 2 Generals [ Arthur and Medreut] @ 1 point = 2 points.

400 Regular Light Cavalry = 0.4 pts x 10 = 1 stand @ 2 points + 2  Generals [ Owain and Cadwy ]@ 1 point = 2 points.

2,000 Hwicce Infantry = 2.0 pts x 10 = 10 stands @ 2 points = 20 points.

200 Hwicce Light Archer Infantry = 0.2 pts x 10 = 2 stands @ 1 point = 2 points.

300 Light Tribal Cavalry = 0.3 pts x 10 = 1 stand @ 2 points + 1 General  [ Rogatainus ]@ 1 point.

Notes;

* The Britons retain the Iniative Point for the entire battle.

* The battle will last for eight Game-Turns.

* The Seaxons move first on the first two Game-Turns.

* From Game-Turn Three until Game-Turn eight, the Britons move first

* The Briton Army fires first on each Game-Turn.

* The Glyme is not very deep, so stands can move through with no penalty.

Once again both armies face each other  across the River Glyme. Aelle is contemptuous of the Britons, having been responsible for the death of Ambrosius. Confident that his warriors will easily beat the Britons again, he leads his men across the river.

Osla, seeing Aelle advancing, does not want the Jutes taking all the credit for this victory so he also leads his warriors forward.

This time , as the Jutes and Angles  attack,  they are stunned to hear Germanic voices within the Briton army.  The Wallisch are also putting up a stern resistance. As the battle went on the Seaxons start to tire. 

Arthur seeing the Seaxon line falter gives the signal. As the horns are sounded the Briton line parts and Owain brings the cavalry forward into the enemy. This is enough to break the Seaxons.

The cavalry are reformed as the infantry go forward to pursue the enemy through the trees. Nightfall brings an end to the slaughter. Three days later, Arthur leads his victorious army into Caerleon amid great rejoicing.

They do not have time to rest before another urgent message arrives at Arthur,s headquarters. More Seaxons are west of the Trent!


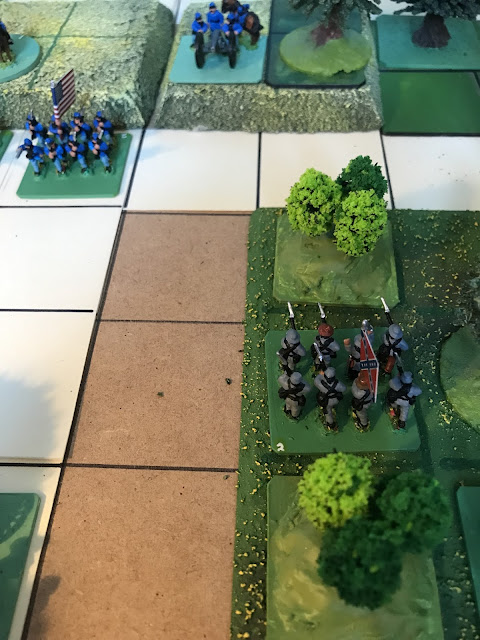
*Most of the figures are Hat Industries with some of the figures being Newline Designs.

*Arthurs horse is from Ceaser Miniatures.

* The hills were made by Brian at Essex Miniatures.

* Some of the tree bases are from S and A Scenics.

* The trees are from various manufacturers.

* The square 40mm stands are made of picture framing cardboard.

* The round 40mm bases are from Minibits.

Historical Note;

Nennius wrote that Arthurs first battle "was at the mouth of the River GLEIN".  I think he got the spelling wrong. I think it was GLEIM from the Anglo-Saxon GLOEM,which means "sparkle' or "glitter".

The current River Glyme gets its name from Old Brythonic, meaning " bright water", so thats  why I put the battle there.  I inadvertantly stumbled on this when I was trying to work out logically where Ambrosius would face the Seaxons.

The  mouth of the River GLYME joins the river EVENLODE near the village of Bladdon. The village got its name from the old name for the EVENLODE, which was the BLADE.

The River Glyme also marks the frontier of what I think ,was Briton territory at that time.

Finally, the river Glyme runs through the Blenheim estate at WOODSTOCK. It was partially dammed by the famous landscape gardener, Capability Brown to form shallow lakes.


Sunday 18 July 2021

Battle of Camp Wildcat, Wilderness Road, Kentucky, October 21st 1861.

 This blog is my own interpretation of events. Any mistakes are my own.

In 1750 a Doctor Thomas Walker first tracked a route through the Appalachian Mountains. When he found the Cumberland Gap, he named it after the english Duke. An unknown frontiersman by the name of Daniel Boone explored the Gap and the Wilderness Road.

Over time this route became the main thoroughfare between Kentucky and South-West Virginia through the mountains. Therefore it became an area of conflict firstly between European settlers and Native Americans, then the Civil War.

At the northern end of the Gap was Kentucky which was a divided state and both sides were tussling for control. At the southern end, The Union wanted to protect their supporters in East Tennessee.. 

For the Confederate Government, they wished to protect the southern end of the Gap to stop Union access to South-Western Virginia and protect its supporters also in its immediate neighbour to the west, Tennessee. 

A Union force under the command of Albin F. Schoepe marched into the Northern end of the Gap and took up postions on both sides of the road, facing south,around Hoosiers Knob.

 From South-West Virginia, Brigadier General Felix Zollicoffer advanced his force north to drive out the Union troops.-----

Here is the map;


The Union Army; 3,650 [ 3.650 points x 5 = 18 points r/d ].

1 General [ Schoepe ] @ 1 point.

7th Kentucky infantry [ 600 ]. 1 stand of 2nd class Line  Inf @ 2 points.

17th Ohio infantry [850]. 2 stands of 2nd class Line Inf @ 2 points = 4 pts.

7th Kentucky Home Guard [ 600]. 2 stands of 3rd class Line Inf @ 1 point = 2 pts.

33rd Indiana infantry [ 700 ]. 4 stands of 3rd class Line Inf @ 1 point = 4 points.

14th Ohio infantry [ 300 ]. 1 stand of 2nd class Line Infantry @ 2 points.

1st Ohio Artillery Battery [ 4 guns + 150 gunners ]. 1 stand of Light Artillery @ 1pt.

1st Kentucky Cavalry [ 450 ]. 1 stand of Line Cavalry 2 points.

Union Reinforcements;

General Schoepe wasn,t sure if he could hold his position with the troops he had. He sent urgent messages to his superiors for support. 

General Theophilius T. Gerrard was sent with more troops. In the event, they were not used but I have included them here for completeness.

2,400 [2.400 points x 5 = 12 points ].

1 General [ Gerrard ] @ 1 point.

38th Ohio infantry [ 800 ] 2 stands of 2nd class  Line Infantry @ 2 points = 4 points.

1st East Tennessee infantry [800 ]. 2 stands of 2nd class Line Infantry @ 2 pts = 4 pts.

2nd East Tennessee infantry [800 ]. 3 stands of 3rd class Line Infantry @ 1 pt = 3 pts.


Confederate Army 4,644. [4.644 points x 5 = 23 points r/d ]

1 General [ Zollicoffer ] @ 1 point.

15th Mississippi infantry [850]. 2 stands of 2nd class Line Infantry @ 2 points = 4 pts.

11th Tennessee infantry [880]. 2 stands of 2nd class Line Infantry @ 2 points = 4 pts.

17th Tennessee infantry [914]. 2 stands of 2nd class Line Infantry @ 2 points = 4 pts.

20th Tennessee infantry [880]. 2 stands of 2nd class Line Infantry @ 2 points = 4 pts.

29th Tennessee infantry [700]. 2 stands of 2nd class Line Infantry @ 2 points = 4pts.

Battery (A) Tennessee Artillery [ 4 guns + 150 gunners ]. 1 stand of Lt Artillery @ 1 pt.

2nd Tennessee Cavalry Battalion [300]. 1 stand @ 1 point.

Here are the figures laid out for battle;


Most of the information on this battle was obtained from the Camp Wildcat Battlefield Trust site. I managed to find out unit strengths at the start of the war but, i dont know how accurate they are.

The battle was played out on a 3 foot x 2 foot board. ( 90cm x 60cm ).

Much of the scenery was made up of cork tiles and Garden Kneeling Pads bought from Wikinsons for a pound each. These can be cut with a craft knife. The trees are from various manufacturers. The house is from Peter Pig.

The large mountain-like scenery pieces on the left of the board are rough cut pieces of polystyrene packaging on cardboard.

The figures are a mix of Peter Pig and Miniature Figurines. The flags are from Peter Pig. The bases are 40mm square picture framing cardboard. The round bases are 40mm mdf from Minibits.

A Note on Scenery:

I have bases of cardboard to mark out the extent of a wooded area. This allows the trees to be moved about, making it easier to move figures.

Figure stands can be moved up and down hills where they are stepped. if the hill is not stepped then stands of figures cannot be moved upon them.

As you can see in the next photo, figures can only be moved on the stepped part of the hill, not where the hill sections are sandwiched.


Playing the historical battle.

* This is a Regimental level game. Some regiments were dispersed at the start. Those Regiments coming onto the table with stands in adjacent squares will attempt to remain together even on the diagonal.

*  On the first two Game-Turns, the Confederates move first and fire first. The Confederates also get the Initiative Point.

* From the 3rd to the 8th Game-Turn, the Union player takes the Initiative Point although both sides throw a die to determine who starts the Game Turn [ and who wins any tied results].

All Infanty are treated as Line Infantry, therefore infantry  stands can only move through the face of a square, not diagonally. The same rule applies for mounted cavalry. 

Artillery and dismounted cavalrymen  can be moved in any direction at a two square movement rate.

* Victory conditions;

After eight Game Turns, the Winner will be the side loosing the least number of stands


Tuesday 1 June 2021

Extract of a Diary.

 Extract from the Diary of Lieutenant George Smith.

N.S.H.A; 5th (British ) Division;


Esper 2260.

This is the 5th year of my Tour on Esper. So far, my Company is in one piece. There have been no attacks by E.T,s and so far no Merc Companies have come calling.

You never know why you are sent somewhere. We are six Light Years from Earth. Only the big Corporates can run Intersteller  flights using Light Speed.

They can only do two flights. One out fully loaded ,one back travelling light. The engines and the crews burnt out.

The N.S.H.A.; the NATO Solar Human Army becomes your home. The joke is that the NSHA means, Never Seeing Home Again.

 They tell you that you will see home again on Rotation but they never tell you when the ship is due. If ever. Even the Brass don’t know.

 The people here have a history like Earth but without the heavy industrial, and with basic Tech..There is a story they were planted here by some other Race.

Apparently, we are here to “ maintain a presence” and there is some mineral here that the Suits want. We get on with the locals and there has been some fraternising  but we have to stay Frosty.

We have two small Warships on Orbital but they don’t see everything. We have APC,s , Armoured cars, Artillery ( who control the Drones) and an Engineering Section and that’s it. No Big Stuff and No Bots. We didn’t rate the expense. There are still 500 of us on station.

Almost like a Recon. Our arses are fried if  the shit hits the fan and something comes in all stomping.

The Brass didn’t give us any Clues and the Colonel is not saying much. I don’t mind maintaining a presence. What concerns me is any other “ Presence” that we might come across.........,

Saturday 22 May 2021

Battle of Fredericktown ; Madison County, Missouri; October 21st 1861.

 This blog is my personal interpretation of the historial action as a wargamer. Any errors are my own. The positions of the formations and the numbers involved are also my best guess due to the limited information I had access to.

At this time skirmishes and partizan activity were taking place all over Missouri in order to secure the state for either the Union or the Confederacy. In the South-Eastern part of the State, the 1st Division of the Missouri State Guard were raiding Union Facilities. General Merriwether "Jeff" Thompson led this formation aided by Colonel Aden Lowe.

The Union Army sent Colonel Joseph B. Plummer aided by Colonel P. Carlin to bring Thompsons actions to an end. When the Union force advanced to Fredericktown, Thompson,s force was pushed 12 miles south. Thompson did not want to give up the town so, after securing his supply waggons, he decided to lead another attack against the Union position.

In order to lure the Union troops forward Thompson positioned one Regiment forward of his main line with an old 12lb field gun hoping to spring a trap-----,


Here are the armies  positioned for the battle;


Confederate Forces; 1st Division; Missouri State Guard.

1st Division 1,500 = 1.5 x 20 = 30 points.

Brigadier Merriwether "Jeff" Thompson @ 1 point.

Colonel  Aden Lowe @ 1 point.

1st Missouri Line Infantry Regiment; 2 x 2nd class infantry stands @ 2 pts = 4 points.

2nd Missouri Line Infantry Regiment; 2 x 2nd class infantry stands @ 2 pts = 4 points.

3rd Missouri Line Infantry Regiment; 2 x 2nd class infantry stands @ 2 pts = 4 points.

4th Missouri Line Infantry Regiment; 2 x 2nd class infantry stands @ 2 pts = 4 points.

1st Cavalry Regiment; 3 x 2nd class line Cavalry stands @ 2 points = 6 points.

2nd Cavalry Battalion [ Stoddard County Rangers ] 1 x 3rd class Cavalry @ 1 point.

13th Missouri Light Artillery [ Harris,s Battery] 1 x Heavy Artillery stand @ 2 points

  "         "               "         "            [Harris,s Battery] 1 x Light Artillery stand @ 1 point.

2 x  Supply Waggons @ 1 point = 2 points.


Union Army; South Western Missouri.

1,800 = 1.8 x 20 = 36 points.

Colonel Joseph B. Plummer [ Commanding] @ 1 point.

Colonel William P. Carlin @ 1 point.

8th Winsconsin Infantry; 4 x stands of 2nd class Line Infantry @ 2 pts = 8 points.

11th Missouri Volunteer Infantry; 4 x stands of 2nd class Line Infantry @ 2 pts = 8 pts.

17th Illinois Infantry; 4 x stands of 2nd class Line Infantry @ 2 pts = 8 points.

1st Indiana Cavalry Regt; 2 x stands of 2nd class Line Cavalry@ 2 pts = 4 points.

Captain Stewarts Illinois Cavalry; 1 x stand @ 1 point.

1st Mississippi Light Artillery Battery; 3 x stands of Light Artillery @ 1 pt = 3 points.

2 x Supply Waggons @ 1 point = 2 points.

This is the map;


Notes;

This is a Regimental  level game. A slightly alternative method is that the stands of each Infantry  Regiment when moved, must stay in adjacent squares to each other even diagonally. All infantry are classed as Line so these stands can only move through the face of a square, not diagonally.

If one stand of a Regiment suffers a "MOVE BACK" as a result of FIRE or COMBAT, Then on the movement phase of the next Game-Turn the stands of that Regiment must be moved to be adjacent to each other.

According to the maps I have seen, the Cavalry Regiments were operating in independant Squadrons/ Companies ? therefore the Cavaly stands do not have to be adjacent to each other.

Dismounted Cavalrymen are classed as skirmishes so can move in any direction.Some mounted cavalry are only 1 point. If they dismount the dismounted cavalry only get a basic die roll for the stand.

In regard to the Artillery, The Confederate Artillery positioned their guns individually. The Union Artillery were kept together.

I,m surmising that because this action took place early in the War and in the Western theatre, where both sides suffered supply problems, All the weapons would be smoothbore.

Also, I don't know if the Light Artillery had horses or not so I went with the two square move distance.

Victory conditions; 

The winner will be the side that has lost the lower number of stands at the end of  8 Game-Turns.

The battle was fought on a 3 foot x 2 foot  (90cm x 60cm) board

Credits,

The figures used in the scenario are a mix of Peter Pig and Miniature Figurines with some Essex Miniatures, all 15mm.

The flags are from the Peter Pig range as are the Supply Waggons.

The Hills are mostly by Brian at Essex Miniatures. One hill was made from a garden kneeling pad from Wilkinson’s Stores!

Most of the wood outline bases were made by S and A Scenics with some made from cardboard.

The buildings I think all came from Peter Pig. The roads are made from thin cardboard.

The snake fencing was made by MBM Scenery in 10mm.

The trees were made by various manufacturers.

The square bases were cut from picture framing cardboard 40mm square ( one and nine sixteenths of an inch Imperial) and the round MDF stands are from Minibits.


Most of the information on this battle was obtained from internet searches of American Battlefield Trust sites.


Sunday 9 May 2021

The 5th Century in Britannia: Part 5. Ambrosius, Aelle, and the Seaxons.

As before, this blog is my “ best guess “ as a wargamer, of events in this era, and an attempt to bring some reality to a rather hazy history.

 473AD: By this time Ambrosius [ Emrys Wledig ] is 63 years old. His Wards Arthur and Medreut are 6 and 8 years old respectively. Arthurs sister Anna is also 6. In eastern Britannia there are still communities trying to scrape a living from the soil. However they were in constant fear of the "Seaxon" raiders from the sea.

Note; All warriors of Germanic or Scandanavian origin could have been known to the Britons as Seaxons because of the fighting knife, the "Seax" that they all carried. The Seax had a blade 12"  [ 30cm ] long which broadened at the point and had a single cutting edge.The grip was 4" [ 10cm ] long.

There is the possibility that in time the word “Seaxon” became”Saxon”. Therefore all Germanic invaders were Saxon and could be why the Angles and Jutes fade into the historical background.

These weapons were relatively easy to produce with better quality items reserved for upper class warriors and leaders.

474 to 476 AD; Despite his best efforts, Ambrosius cannot stop Britannia fragmenting into smaller Kingdoms. Merlin is still in the background. As a Briton-born individual, who can also speak Latin he is always with Ambrosius in Council meetings.

The Round-Table Council of Britannia is now held at Caerleon.There are many leaders present. However through marriage and feud five main Kings have become the most powerful and regard themselves as equals. These are;

Erbin of Alclud.

Einon of Gwynedd.

Cadell of Powys.

Cador of Dumnonia.

Nynniaw of Gwent


The Allies of Ambrosius, Hoel and Riothamus have returned to their respective territories taking their troops with them. Amorica is under constant attack from Eurics Visigoths. Riothamus has problems not only with the Visigoths but also Geiserics Vandals.

Ambrosius has a hard time convincing the assembled Nobles that he needs a mobile army [ a Commitatenses], in order to stop any Seaxons settling in Britannia.  These new Kings do not trust each other and they regard Ambrosius as an Outsider, but they are in awe of Merlin. They grudgingly supply Ambrosius small numbers of men for the Field Army. His only Veterans are some of his Officers and his Cavalry.

Meanwhile, in Gaul the Saxons, Jutes and Angles are being forced out of Normandy and the Loire Estuary. there are also Germanic  warriors on Andum [ Jersey] and Lesia [ Guernsey].

476 AD; In Italy, the Western Roman Empire was in its final death throes. A barbarian Patrician by the name of Orestes had seized power. In turn he had promoted his son Romulus Augustulus [aged 16] to the position of Emperor. The centre of power in the waning Western Empire is Arelate ( Arles ) in south- eastern Gaul.

A Foederati General named Odoacer is the next to sieze power. Odoacer has Orestes killed. he then has Romulus exiled to Castelum Lucellum. Romulus is never heard of again.

Odoacer has the Imperial Regalia sent to the Emperor Leo in Constantinople with a message  saying that it was no longer required. With this act the Western Roman Empire ceased to be.

477 AD;  The incursions into Britannia begin in the Spring. Ambrosius at Caerleon gets a report that a large group of Seaxons with women and children have landed at Selsey. The leader of this group is called Aelle. he has three sons; Cymen, Wlencing and Cissa, along with 2000  Jutish people including 800 warriors in 20 ships.

Aelle moves north and attacks Chichester ( Noviomagus Reginorum). The town is in a poor state with dilapidated walls and there is only a small population. These people are killed or driven out with most making their way to Portus Aderni [ Portchester ].

As Ambrosius musters the army, more reports are coming in of Seaxon landings. Fifty ships have landed at Lundene on the Thamesis, carrying 5000 people including 2000 warriors. This is the Saxons under Bardulf and his brother Colgrin.

A third landing has taken place on the estuary of the river Welland. Another 2000 people including 700 warriors. This is Osla with his tribe of Angles.

477AD; Ambrosius decides that Aelle has to be dealt with first. Giving the army a victory would give them confidence. Ambrosius gives Medreut his first independent command.

In July Medreut sets out with his force taking seven days to reach the Chichester area via Glevum and Silchester. The force consists of;

3 cohorts of Auxilliary Infantry @ 200 men = 600.

600 = 0.6 x 40 = 24 points = 12 stands of Auxilliary Infantry @ 2pts.

1 Cohort of Light Archers @ 200 men;

200 = 0.2 x 40 = 8 points = 4 stands of Light Archers @ 1point = 4 points.

Medreut @ 1 point.

Owain @ 1 point.

2 stands of Militia Light Archers @ 1 point = 2 points.

1 Cohort of Light Cavalry ( javelins, spear, sword, shield, helmet ) @ 200 men;

200 = 0.2 x 40 = 8 points = 4 stands @ 2 points.


Aelle has been told of the Britons approach and draws up 700 warriors on Dummer Hill just north of Chichester ;

700 = 0.700 x 40 = 28 points;

Aelle @ 1 point.

Cissa @ 1 point.

Cymen @ 1 point.

Wlencing @ 1 point.

4 stands of Light archers @ 1 point = 4 points.

10 stands of Warrior Infantry @ 2 points = 20 points.

Some of the warriors under Cymen,s command are left within Chichester to protect the people. ( 2 stands of Warriors and 1 stand of Archers ).

Here are the opposing armies laid out for battle;


NOTE; There are two ways to fight this battle

1] Allow the Jutes to move first and fire first on every Game-Turn and to keep the Initiative Point on every Game-Turn.

This would stop the Briton army from being able to manouvre. Also, with no space to allow for "move-backs", the Briton army would start losing stands quite early in the game.

2] Play the game in the normal way.

The Watchtower can only be entered by Infantry.  One movement phase is required to move in. One movement phase out. Stands can Fire or engage in Close Combat after the Movement phase of the same Game-Turn.

Each game is played for 8 Game-Turns.
-------------------------“------------------------------

As Medreut forms his men Aelle leads an all-out charge downhill into the Britons. Before Medreut can react the men break! 


Some try to put up a fight but they are no match for Aelle,s seasoned warriors. Medreut joins Owains cavalry in fighting a rearguard action.


Having retreated, Medreuts force makes a weary journey back to Caerleon. Aelle now establishes his group in the area.

Noviomagus becomes Cissa-ceaster.  Modern Selsey becomes Cymensora at that time and the village of Lancing gets established.

The Winter Solstice of 477 brings a stormy meeting at Caerleon. Ambrosius asks the Kings for more support, pointing up the success of the Jutes and the possibility of the enemy tribes combining with the Scots-Irish. It is only a matter of time before the homelands are invaded.

After a series of angry meetings. Ambrosius gets the troops he needs. Towns on the frontier like Viroconium are repaired and manned. The fleet stays protecting the West coast.

478 to 483 AD; In this six year period, the Briton mounted troops continuously attack Seaxon terrritory. The infantry go out in small bands raiding where they can. Arthur and Medreut are 16 and 18 respectively and leading raids into enemy territory aided by experienced warriors

484 AD;  A pivotal point is reached. The Seaxons hold their first Witan ( a Council) at Lundene, which is now an Angle settlement.

The people are angry with their leaders because of the continued attacks by the “ Walisch “( the Britons ). A decision is made to attack into Gwent and on to Caerleon.

In May, 400 Jutes under Aelle, 500 Saxons under Bardulf, 500 Saxons, under Colgrin  and 800 Angles under Osla gather at Verulamium ( Saint Albans ). Bardulf is elected as leader. Three days later this army of 2,200 men commences the march westward on the old Roman road of Akemen Street toward Glevum.

Ambrosius, on hearing of this advance by the Seaxons, musters the army in the old amphitheatre at Caerleon. The army is expecting him to lead them. At 73 he can feel his body failing him but he knows he has to be there.

 Arthur is to lead the Elite Clibanarii,  Medreut, the  Infantry. Owain is to lead the Light Cavalry and assist Medreut. Morfael one of Nynniaw,s Veterans is to lead the Gwent Militia. The Briton Army of 2,600 men =2.6 x 20 = 52 points.

1,200 Auxilliary Infantry [ Javelins, Plumbata, Swords ] in 6 Cohorts; 1,200 = 1.2 points x 20 = 24 points = 12 stands @ 2 points each. 

200 Light Archers in 1 Cohort = 200 = 0.2 x 20 = 4 points = 3 stands of Archers @ 1 point + Owain @ 1 point.

200 Light Cavalry in 1 Cohort ( spear, javelins, helmet, sword and shield ).= 200 = 0.2 x 20 = 4 points = 1 stand @ 2 points + Arthur @ 1 point + Medreut @ 1 point.

300 Elite Clibanarii Cavalry in 1 Cohort = 300 = 0.3 x 20 = 6 points = 1 stand @ 3 points + Ambrosius @ 3 points.

500 Gwent Militia  [ javelins and spears] = 500 = 0.5 x 20 = 10 points = 5 stands @ 2 points each.

200 Gwent Light Archers = 200 = 0.2 x 20 = 4 points = 3 stands @ 1 point + Morfael @ 1 point.

A feeling runs through the Army that this is THE battle. weapons and armour are bought to their best. The Army takes the road leading East marching past Glevum. After three days, the Briton force reaches the valley of the River Glyme.

Ambrosius knows this is where he will fight his last battle so has donned his best armour. the Seaxon Army is also drawing near having arrived at the abandoned site of Alchester on the Akeman street route.


The next day, the two opposing armies draw up on opposite sides of the gently undulating valley.  The Seaxons facing West, the Britons East.

The Seaxon Army lines up in order;

Left Wing; 800 Angles = 800 = 0.8 x 20 =16 points= 7 stands of warriors @ 14 points + 1 stand of Light Archers @ 1 point +Osla @ 1 point.

Left centre; 500 Saxons = 500 = 0.5 x 20 = 10 points= 4 stands of warriors @ 2 points + 1 stand of Light Archers @ 1 point + Colgrin @ 1 point.

Right centre; 500 Saxons = 0.5 x 20 = 10 points = 4 stands of warriors @ 2 points + 1 stand of Light Archers @ 1 point + Bardulf @ 1 point.

Right wing; 400 Jutes = 400 = 0.4 x 20 =8 points = 3 stands of warriors @ 2 points + 1 stand of Light Archers @ 1 point + Aelle @ 1 point.

NOTE; All the warrior infantry carry throwing weapons. The River Glyme is very shallow so any stands can move and fire as normal while positioned in the river.

 However the Cavalry do not get the 3 points for attacking Infantry, if the Cavalry stand is itself positioned in the river.

The game is played for 8 Game-Turns.

Aelle and Ambrosius; 

 At the end of the 8th Game-Turn, if the stand representing Aelle is in an adjacent square to Ambrosius, one six sided die is thrown by the Seaxon Player. On a roll of 3,4,5 or 6 ; Ambrosius is removed from the board.


Ambrosius exhorts his men. Failure would mean the end for their families and country. Bardulf, being the elected leader of the Seaxon force tells the army that failure would see them and their families being swept into the sea!

After a brief moment of reflection, Ambrosius raises his sword with the battlecry; DUW A PRIDAIN!

Bardulf replies with WOTAN! 

After six hours of fighting both sides are exhausted with neither gaining an advantage. All the leaders are caught up in the fighting with the heaviest combat centred on Anbrosius’s position. Even the cavalry has been negated by the terrain. In a last ditch attempt Ambrosius launches his Clibanarii at the right wing of the Seaxon army where Aelle is positioned. This time Ambrosius with Arthur leads the attack. Aelles men lock shields as the horsemen approach uphill.

The horses can only trot at the enemy infantry and cannot force the line. As the fighting ebbs away, Aelle launches a spiculum which finds its mark. Ambrosius is mortally wounded! As the two sides draw apart the Seaxons withdraw behind locked shields. The Britons are to tired to pursue. The Britons claim a victory but it is phyrric.


The body of Ambrosius is carried back to Caerleon to be buried. The morale of the Army is low. the people are frightened. In the meantime the Seaxons have dispersed back to their settlements in high spirits. The Germanic settlers know they have won a great victory. Aelle,s status rises amongst the tribal leaders.

As the Winter Solstice of 484 arrives, the Kings gather to  bury Ambrosius, and to decide what to do next. Without the personal force  of Ambrosius, each King refuses to appear subservient to the others.  There is only one remaining character who has the Power and Mystery to exert any influence;

MERLIN.

As before, the table I use is 3 feet x 2 feet ( 60cm x 90cm). The figures are nearly all Hat Industries with some Newline Designs and Miliart..

The square bases are from picture framing card. The round bases are from Minibits.

The representation of Chichester is scratchbuilt. The Watchtower is an old model of a Saxon building with a scratcbuilt tower added.

The hills are from Brian at Essex miniatures. One hill is made from a garden kneeling pad from Wilkinson’s.

The wood bases are from S and A Scenics and the trees are from various manufactures

The river and road sections are cut from thin cardboard.

The Seax  or Scramasax