Thursday 24 November 2022

The Way of the Pike.( inc The Paperboys of Peter Dennis),

 In Table Top Battles, I have given basic instructions as to the use of stands of Pike, both for the Ancient era and the 16th-17th Century. I thought I would expand on the original text.

SARISSA ARMED PIKEMEN.

* Pikemen are placed on a stand, and used as an independent unit.

* A stand of sarissa-armed Pikeman can only move through the face of a square not a diagonal. 

* When engaging in Combat on the forward face, the stand of Pikemen is worth 4 points. However if the stand of Pikes is attacked in the flank or rear in close combat while being attacked in close Combat from the front, that stand is only worth 2 points.

* The Sarissa-armed stand cannot engage an enemy stand to its front if there is another friendly stand of any type to its front between it and the enemy stand.

THE 15th AND 16th CENTURY.

* This was the Renaissance of the Pike as an offensive weapon used en masse, particularly by the Swiss.

* Each stand of Pike operates as an independent Unit like the sarissa-armed Greeks.

* These stands can only move through the face of a square, not a diagonal.

* These stands are worth 3 points on their forward face. However, if engaged in close combat on the flank or rear while being engaged from the front, the stand is only worth 2 points.

PIKE SUPPORT FOR MUSKETS AND CROSSBOWS

THE TERCIO;

If Pikemen are in an adjacent square to a stand of muskets/crossbows, which are engaged in close combat by attacking CAVALRY; The points of the Pike stand is added to the adjacent musket stand under attack. The TERCIO must be formed as shown for stands of musketeers to claim the points of the Pike.

If a stand which is part of a TERCIO suffers a “ Move-Back”, that stand is removed from play. If the entire Tercio is involved in Close Combat and suffers a “ Move-Back”, the ENTIRE TERCIO IS REMOVED FROM PLAY.


INFANTRY COMBAT; 17th and 18th CENTURY;

* In the 17th century century, Musket armed infantry became the mainstay of European armies. Although Musketeers were not afraid to mix it with Cavalry, ( using the matchlock musket as a heavy club! ),Pikemen were still required to anchor the line and to spearhead  any assaults.

 All European armies had various formations integrating Pikes and Muskets. The density of these formations became more shallow as Artillery became more powerful and more mobile.

In recent times, historians have surmised that the Pikemen in English Civil War Regiments stayed together as a group rather than being dispersed among the muskets. The musketeers of a company manoeuvred around their Pikemen.This may have been the case leading into the 18th century

By the early part of the 18th century, the Pike had virtually been made redundant by the invention of the bayonet. However during the Great Northern War the Swedish Army still had one third of an Infantry Battalion  as Pikes, even though bayonets were used.

The British Army had Pikes but these were carried in wagons and used as field defenseworks! having mastered the use of the flintlock.


* Pike stands are an individual unit.

* Pike stands can move through a face of a square, not a diagonal.

* The Pike stand is worth 3 points on its front face. However if a Pike stand is attacked in close combat on it flank or rear whilst being in close combat on its front face, the stand is only worth 2 points.

* If a Musket or Pike stand is in close combat with an enemy stand to its front, and, has a friendly stand of Pikemen in an adjacent square to the rear of the friendly stand in combat: the points of the Pike stand are added to the friendly stand in combat.


THE PAPERBOYS OF PETER DENNIS:

These little blocks have a smaller footprint on the table than the standard 40mm square stand. Each block has a 40mm x 15mm stand. Therefore;

* Two blocks of Infantry are allowed within a square.

* Both blocks must face in the same direction.

* If the front block suffers a “ move-back”, BOTH must be moved back.

* If the front block suffers a half or less score in firing only the front block is removed from play.

* If muskets are in the front rank and Pikes are in the second rank, this means that Pikes can be involved in a close combat.


* If the pikes are in a separate square behind the muskets ( or Pike ) the Pikes CANNOT be included in the close combat.


*  If BOTH stands are involved in a close combat and suffer a “ move-back”, then BOTH stands must be moved back.

* BOTH stands are removed from play if the front block suffers a half or less score.


* In order to form a Tercio two blocks of Pike must be back-to-back within a square. The muskets must be in each square around this square and all may claim protection of the Pikes.


I hope this article helps to clarify the use of Pikes on the table.

Friday 4 November 2022

The Battle of Fort Donalson. Stewart County. Tennessee. 11th / 16th Feb, 1862.


 The following is my personal interpretation of this battle. Any mistakes are my own. I would also like to thank Marvin Scott for the information that he provided about the battle

In keeping with the Anaconda plan devised by the Union General Winfield Scott, Brigadier General Ulysses Grant came up with a plan to take the Confederate forts on the Mississippi River thereby splitting the Confederacy in half and fracturing the Confederate supply lines.

When Grant put his ideas to his Superior, Halleck, he was met with indifference. Grant was at that time, a local Commander of the Union Garrison of Cairo.

Grant was lucky in that he got on well with Admiral Andrew Foote, the commander of the Mississippi River fleet. The Admiral interceded with Halleck on Grants behalf and managed to convince  the General that Grants plan was sound. During 1862 Grants efforts aided by Footes river fleet made progress against Fort William Henry partly helped by the fact that the Fort was prone to flooding. The 2000 Confederate troops that survived the attack made their way to Fort Donelson on the Cumberland  River

Grant moved his Army in pursuit  while Footes Squadron moved out of the Tennessee River, up the Ohio, then into the Cumberland. As Grants troops marched the 12 miles toward Fort Donalson; they were slowed by the delaying tactics of Confederate cavalry led by Nathan Bedford Forrest.


Eventually, Grant’s force arrived at the Confederate held fort. There were two Union Divisions. John McClernand’s, which took the right flank, and Charles Smith’s, on the left.

From the 11th to the 14th the Union Army  and Navy launched sporadic attacks against the Fort but these were beaten off by the Confederate defenders. The ships of Andrew Foote’s river Squadron suffered a lot of damage. The Gunboats could not elevate their guns to hit the Fort effectively. The Confederate gunners of the Battery facing the river used plunging fire, so were able to cause considerable damage to the Union Flotilla.

The Union General Grant realised that he needed more troops in order to besiege the Fort. Therefore he called up Lew Wallace’s Division which had been left at Fort William Henry. In a meeting at Crisp House, Ulysses Grant met with Andrew Foote to discuss tactics. It was decided that one of the Gunboats still operational, would make a demonstration against the River Batteries of the Fort while troops surrounded the defences on land.

Union reinforcements arrived and were added to Lew Wallace’s Division arriving from Fort William Henry. Grant positioned Wallace’s Division in the centre of the line allowing McClernand’s Division to move to the right completing the investment of Fort Donalson and the adjacent town of Dover.


The Confederate General; John B. Floyd held a meeting with with his Senior Officers: Gideon Johnson Pillow, Simon B. Buckner and Nathan B. Forrest. There was a realisation that starvation and attrition would take its toll on the Garrison. Therefore, It was decided to attempt a breakout from the Fort, south -east toward Nashville. ———————.

THE UNION ARMY: 24,500 = 24.5 pts x 3 = 74 points.

C-in-C: Ulysses “Sam” Grant  @  2 points.

1st DIVISION;

1 General, ( John McClernand )   @   1 point.

5 stands of 2nd class Line Infantry @ 2pts = 10 points.

3 stands of  Dragoon Cavalry @ 1 point =  3 points.

2 stands of Light Artillery  @ 1 point = 2 points.

2nd DIVISION;

1 General ( Charles Ferguson Smith )   @  1 point.

11 stands of 2nd class Line Infantry @ 2 points = 22 points.

1 stand of Skirmish Infantry  @ 1 point.

1 stand of Light Artillery   @ 1 point.

3rd DIVISION;

1 General ( Lew Wallace )  @ 1 point.

14 stands of 2nd class Line Infantry @ 2 points = 28 points.

1 stand of Skirmish Infantry @ 1 point.

1 stand of Light Artillery  @ 1 point.

note: This force would later be known as The Army of Tennessee.

CONFEDERATE ARMY GARRISON OF FORT DONALSON;

13,000 Infantry,

600 Cavalry.

2,400 Artillery Personnel ( 600 Gunners, 1,800 attached infantry ).

Total: 16,000 = 16 points x 3 = 48 points.

RIGHT WING AROUND FORT DONALSON;

1 General ( Simon Bolivar Buckner )  @ 1 point.

7 stands of 2nd class Line Infantry  @ 2pts = 14pts.

LEFT WING;

C-in-C, John Buchanan Floyd   @  1 point.

1 General ( Gideon Johnson Pillow )  @ 1 point.

8 stands of 2nd class Line Infantry @  2pts = 16 points.

CAVALRY BRIGADE, ( in the town of Dover).

1 General ( Nathan Bedford Forrest )  @ 1 point.

2 stands of Dragoon Cavalry  @ 1pt = 2 points.

ARTILLERY;

1 stand of  Position Artillery  @ 2 points.

5 stands of Light Artillery  @ 1 point = 5 points.

UNION RIVER FLOTILLA;

The original Flotilla had 4 Ironclads and 2 Tinclads. I calculated a total of 6 x 100 crew = 600 crew.

0.600 x 3 = 1.8 or 2pts r/u. =  2 ships @ 1 point each.


BATTLE NOTES;

* The Confederates retain the Initiative Point for the entire Battle. Who gets first move in each Game-Turn is still diced for as this decides tied results and who decides the Combat sequence.

* In regard to ranges, I’ve stayed with the ranges for smoothbore weapons.

* Light Artillery move up to 2 squares.

* The Confederate defenceworks count as “Trench”. Plus a 2 point deduction for attacking uphill

( The defenceworks around The Confederate position were a series of trenches and rifle pits behind Abbatis, It had been raining which had changed to snow showers. However, the weather was dry during the battle and doesn’t seem to have affected movement or firing).

* The tree line along Hickman Creek cannot be entered by either side.

* The Gunboats move at 2 squares each Game-Turn.

* The  2 Confederate Batteries facing the river from the Fort can add 1 point to the die roll for the plunging fire.

* The Light Artillery move at 2 squares range.

* Rivers can only be crossed by the bridges.


EXCHANGE OF FIRE BETWEEN THE GUNBOATS AND SHORE BATTERIES;

*  The gunboats and shore guns do not have to “ Moveback”. Damage is caused by any lower score. The Gunboats can take two hits. On the first hit, one point is deducted from return fire. After the second hit, 2 points. The third hit destroys the Gunboat. 

The same rule applies to the two stands of  Confederate guns facing the river. All the other guns follow the normal rules for Artillery.

* The battle will be played for 8 Game-Turns. The winner will be;

A) The Union Army wins if there are any Union stands inside the Confederate Defenseworks at the end of Game-Turn 8.

B)  The Confederates win if there are no Union stands inside the Defenseworks by the end of Turn 8.


As an alternative you could fight this scenario as two scenarios. In the first battle, the Union army has two Divisions ( C.F Smith and McClernands) which is played for 8 Game-Turns. McClernands Division is placed in Lew Wallaces position.

In the second scenario, the remains of Smith’s and McClernanand Divisions are positioned as shown on the map above with Lew Wallace’s Division placed in the centre. The Confederate player can either A) leave the remaining stands where they are, or B) moving remaining stands back inside the defenseworks.

CREDITS;

All the figures shown are mostly Peter Pig and Minifigs with some Essex Miniatures. The Gunboats are scratchbuilt. The Hills are a mixture of ones made by Brian of Essex Miniatures and homemade from kneeling pads and cork tile. The trees are from Amazon decorated with runny PVA glue and snow dust.

The “snow” ground is thin card as are the rivers and roadway. The bridges are nearly all scratchbuilt. The houses are mostly Peter Pig with a couple of Hovels.

The defences were made from cardboard and pan scrubbers with added brown Plasticine..

The battle is played on a 3 foot ( 90cm ) x 2 foot ( 60cm ) table.


Wednesday 28 September 2022

Added Rules ( Instructions) for Science Fiction Gaming.

Below are some extra rules to add to to those listed in the Table Top Battles 2nd Edition.

VEHICLE STATS                  DEFENSE POINTS.                                  

Deployed Towed Artillery;                3pts.                         

Deployed Towed Heavy Artillery;    3pts.                         

Limbered Towed Artillery;                4pts.                  

Light Armoured Personnel Carrier.   4pts.

Heavy Armoured Personnel Carrier.  5pts.

Vehicle-Mounted Small-Arms;        ————.                  

VEHICLE STATS:                     ATTACK POINTS,

Deployed Towed Artillery             5pts.

Deployed Towed Heavy Artillery: 6pts.

Vehicle-Mounted Small-Arms:       3pts.

* RULE CHANGE: Small Arms and Rifles have no effect on Vehicles of 4 DEFENSE POINTS OR ABOVE.

*During a Game-Turn, both sides will roll a 12 sided die to see who fires first, prior to the Firing Phase.

MACHINE GUNS AND  MINIE GUN AGAINST INFANTRY:   If the target infantry stand is caught in the open by Machine gun fire, the target infantry stand is automatically removed on any lower score.

 NOTE: Players will still throw a 12 sided to decide who moves first, gains the Initiative Point and decides Combats.

* The side with the Initiative Point also decides any tied results. 

* Vehicles do not have to “ move-back” as a result of Firing. If not moving back,  a vehicle will have 2 Points deducted from any Firing die roll on return fire within the same Game-Turn.

* vehicles cannot move over or through a square containing another vehicle, wether they be friendly or otherwise.

* Vehicles CAN move through /over a square containing friendly Infantry but cannot actually stop within the square containing the friendly infantry.

* Vehicles and Artillery As Targets : If within 2 squares the target will be destroyed on any lower score, HOWEVER, if the TARGET STAND SCORES HIGHER, IT IS THE FIRING STAND THAT IS DESTROYED.   Infantry targets are classed as a miss, should the Infantry score higher and still have the option to “move-back”.

* If two opposed Vehicles/guns are in adjacent squares during the combat phase and neither wishes to “avoid”, then both vehicles/guns are destroyed in a collision. When the situation is a vehicle versus enemy infantry, then if the infantry fail to avoid, the infantry stand is removed from play.


* Opposed forces will have their Morale calculated by adding the combined Defense and Attack Points of each stand into a grand total. This total is divided by 2 and the end result is the Morale of the Force. This is reduced as stands are destroyed.

* Destroyed vehicle stands are left on the playing area and Both Sides CANNOT move vehicles or figures over or through that square, or diagonally between that square and any obstacle.

* Destroyed vehicles do block line of sight for Firing.

* The Infantry within an APC can leave the APC when the APC stops moving. The Infantry are positioned alongside the APC on that Game-Turn. The infantry can fire. When infantry are adjacent to an APC they can mount up and the APC can move.

* If an APC is hit, it’s points total,plus the points total of the stand or stands it was carrying are removed from the morale total of that army.

BASING FIGURES: 

This is just a suggestion. On my stands I have used this system. 5 figures for Regular armed “Riflemen”. 4 figures for a “Heavy Weapons” group and 3 figures for a Command Group which includes a “Heavy Weapon”. I’ll use 6 figures for a Militia group.

The Kra’vak, I’ve based as 5 “rifles” and 4 to a Heavy Weapons Team. There is no Command. These Aliens just come together for an attack or Campaign!.

This picture shows the “ Orbital Knights Vehicles” from ETSY which are six to a pack. Two I have converted to tanks. The other four are APC,s which each carry two squads. The figures are from Ground Zero Games Kra’vak range.


This picture shows the small “Blower” APC,s. Each one carries  a squad of figures. Each “Company” is of two squads of Rifles. 1 Heavy Weapon squad and one Command Squad that also has a heavy weapon.( This is part of the force that is listed as a Mercenary Company by Brigade Models).


* Towed Artillery can limber up and move OR move and unlimber. The Towed Artillery cannot perform both functions in the same Game-Turn.

* Towed Artillery cannot fire while limbered, and cannot fire in the same turn as unlimbering.

* Towed Artillery do not use the “Move-Back rule but do deduct 2points if firing back within the same Game-Turn.

This picture shows the same artillery piece limbered and unlimbered. ( artillery crew from Brigade Miniatures, Gun and Tractor from Alternative Armies Bradly Fighting Vehicles.)


The above instructions have come about since playing the game shown in the previous blog.

I used the basic rules given in the Table Top Battles 2nd edition and I thought to add a little more detail.

The map of the imaginary world of Esper is in the rulebook.


Battle of Abukkin 2260AD. Swabia. Esper. [ Sci~Fi ]

 Extract from the diary of  Lieutenant George Smith;

Well, the day started ok. Orders came from The Colonel. Arrange for one battery of Artillery to travel out to Abukkin for some practise firing. The local Heta [ the Town Council ] had given permission for the firing.

Captain Rawlinson decided to take a Security Detail with him, four platoons with four Blower APC,s. a small Detail as trouble wasn,t expected. Captain Rawlinson had the camp set up and the firing line established. Just as the fire order was about to be given, the men were stunned to see strange vehicles approaching their position.

At first, the men were wondering what was happening. The Esperans were known not to have any sort of advanced armoured vehicles. As soon as the "Alien" vehicles opened fire, that decided the issue. Captain Rawlinson didnt know what or where they came from, but they were firing on his position so "they" were the enemy. He ordered the guns to target the vehicles. The infantry piled into the Blowers.

The Artillery tried to return fire but our men took heavy casualties. We have managed to get some drone photographs.


The Artillery engaged the Alien vehicles at long range but failed to stop them. The blowers moved out but the weaponry was not powerful enough to penetrate the armour. The survivors made it back to Fort Wellington in the remaining vehicles. The “ Aliens” did not pursue the survivors. The people of Abukkin scattered into the woods.

An enquiry has been ordered to find out why the Orbital Guardships never gave any warning of incoming hostiles!. In the meantime we now have to find out who these attackers were and where these hostiles have gone!———.


PLAYING NOTES:


HUMAN DETACHMENT;

4 stands of  Towed Artillery: Defence 3/ Attack 5  total 8 x 4 = 32.

2 stands of  Lorry Transports: Defense 3 / Attack 3 = 6 x 2 = 12.

4 stands of Blower Armoured Personnel Carriers: Defense 4 / Attack 5 = 9 x 4 = 36.

2 stands of Infantry with Flak Armour and Heavy Weapons: Defense 3 / Attack 4.= 2 x 7 = 14.

2 stands of Infantry with Flak Armour and Rifles:  Defense 3 / Attack 3 = 2 x 6 = 12.

TOTAL: 106 = Morale total = 53.

ALIEN FORCE;

2 stands of Tanks: Defense 5 / Attack 5. = 2 x 10 = 20.

4 Armoured Personnel Carriers ( each carrying two stands) Defense 5 / Attack 4 = 4 x 9 =36.

6 stands of Infantry with Rifle: Defense 3 /Attack 3 = 6 x 6 = 36 points.

2 stands of Infantry with Heavy Weapons: Defense 3 / Attack 4 = 2 x 7 = 14 points

TOTAL: 106 points = Morale total = 53.

THE BATTLE,

* The battle is played for 8 Game-Turns.

* The side losing the battle will have either have lost more stands than the opposition and/or suffered a collapse in Morale.

* The river can only be crossed via the bridge.

* The battle is played out on a 3 foot x 2 foot ( 90 cm x 60cm ) table.


CREDITS:

The figures and vehicles are all 6mm. The Human Infantry, Blower APC,s and Artillery Crew are from Brigade Models (listed as “ A Mercenary Company” ). The Human Vehicles are from Alternative Armies Bradley Fighting Vehicles range.

The Alien Infantry are from the Kra’vak range from Ground Zero Games. The vehicles are entitled “ Orbital Knight Vehicles” which were obtained from the Etsy website online. Two of the vehicles have scratch built turrets made from buttons, plasticard, and plastic tubing.


The bases are 40mm x 40mm and cut from 1mm picture framing cardboard. The trees are by various manufacturers.. The hills are a mix of those made by Brian of Essex Miniatures and some scratch built from cork tiles. The village buildings are scratch built from picture framing cardboard as is the bridge. The roads and river are made of thin card. The fields are made from pan scrubbers.


The above is a section of the map of Esper. The “x” marks Abukkin. Circled is Destioa, the town where Fort Wellington has been established.


Thursday 8 September 2022

Battle of Rocoux. Austrian Netherlands. 11th October 1746.

 This is my personal interpretation of this battle. Any mistakes are my own.

Following on from the battle of Fontenoy, Marshal De Saxe and his Generals made short work of taking over various fortresses within the Austrian Netherlands. The French army was aided in this by the garrisons giving up as soon as the French army appeared.The Netherlands ( modern Belgium) is situated on France,s northern border and considered by Saxe as a good campaign area.

However all was not well within the French Government. The war had been an enormous financial burden on the French Treasury. Louis the 15th and his Ministers were desperate for peace but not from a weak position. Peace talks were already taking place at Breda.

Meanwhile, Marshal Saxe had capped a successful campaign by taking Namur, and thought that the fighting was done for the present, but he was wrong. The Empress of Austria, Maria Theresa, did not want to loose yet more territory to the Franco-Prussian alliance.

Prince Charles of Lorraine was Brother-in- Law to the Empress and commanded the Pragmatic army. The Netherlands were not to be given up. Late September found the Allied army marching south down the western side of the Meuse from the United Provinces ( Holland ) toward Liege.

De Saxe could not believe that the Allied army wanted yet another battle, but when the Allied army crossed the Jeker ( the Jaar) Maurice was determined to win. The Allied column reached Liège, then faced right to bring the army into position facing the direction of the French encampment to the west. 

The Dutch were positioned on the left nearest to Liege with their right flank in Rocoux. Next to them were the British and Hessians. Further right were the Hanoverians covering the village of Varoux. Finally, anchoring the right flank were the Austrians, positioned on higher ground with broken ground to their front.

De Saxe could not not believe what he was seeing. The Allied line was thin and positioned with a major river behind them. However, if battle was what they wanted that was what they would get. 

Because Prince Charles was present, the  British Duke of Cumberland stepped back from the command of the Army. Command of the British contingent and Deputy command of the army was taken up by Sir John Ligonier. A no-nonsense Officer with increasing stature amongst his peers.

Marshal Saxe was determined to stamp his authority on the battle. To that end he sent one of his “ Brigades” under General Clermont through Liège to outflank the allied position. Exactly how this was accomplished is not known. The gates may have been opened by pro-French sympathisers within the city. Once through the city, Clermont,s division attacked the left flank of the Dutch, forcing the Prince of Waldeck to realine his forces

General Clermont-Gallerande on the French left, was told to demonstrate against the Austrians but not to attack. The main effort was to be against the Dutch, British and Hanoverians.—————-


THE FRENCH ARMY: 102,000 = 102 points.

THE “ BRIGADE” OF GENERAL CLERMONT..28,000 = 28 pts.

1 General ( Clermont ).                 @ 2 pts.

1 stand of Grenadier Infantry.       @ 4pts.

6 stands of Line Infantry @ 3pts = 18 pts

2 stands of Light Infantry @ 2 pts = 4pts.

THE “BRIGADE” OF MARSHAL SAXE. 26,000 = 26pts.

1 General ( and C-in-C ) Maurice De Saxe @ 3pts.

3 stands of Line Infantry @ 3pts = 9pts.

1 stand of Grenadier Infantry.   @ 4pts.

2 stands of Heavy Artillery @ 2pts = 4pts

3 stands of Cavalry. @ 2 pts = 6 pts.

THE “ BRIGADE” OF GENERAL CONTADES. 24,000 = 24 pts

1 General ( Contades )  @ 2 pts.

1 stand of Grenadier Infantry.   @ 4 pts.

4 stands of Line Infantry. @ 3pts = 12 pts.

2 stands of Light Artillery. @ 1pt = 2pts

2 stands of Cavalry. @ 2pts. = 4pts.

THE “ BRIGADE” OF GENERAL CLERMONT- GALLERANDE. 24,000 =24pts.

1 General ( Gallerande ).  @ 2 pts.

1 stand of Grenadiers. @ 4 pts.

4 stands of Line Infantry @ 3 pts. = 12 pts.

2 stands of Cavalry. @  2pts = 4 pts.

2 stands of Light Artillery  @ 1 pt. = 2 pts.


THE PRAGMATIC ARMY: 89,000 = 89 pts.

THE DUTCH “BRIGADE” OF THE PRINCE OF WALDECK: 26,000 = 26 pts.

1 General ( Waldeck )  @ 1 pt.

1 stand of Grenadier Infantry. @ 4pts.

5 stands of Line Infantry  @ 3pts =. 15 pts.

2 stands of Light Artillery. @ 1 pt. = 2 pts.

2 stands of Cavalry. @ 2pts.= 4pts.

THE BRITISH “ BRIGADE” of SIR JOHN LIGONIER. 19,000 = 19pts.

1 General (. Ligonier ). @ 2 pts.

1 stand of Grenadier Infantry  @. 2pts.

3 stands of 2nd class Line Infantry. @. 2pts.= 6pts.

2 stands of 2nd class Hessian Line Infantry. @ 2pts = 4 pts.

1 stand of Cavalry @ 2pts.

1 stand of Light Artillery @ 1pt.

THE HANOVARIAN “ BRIGADE” OF GENERAL VON ZASTROW. 17,000 = 17pts.

1 General  (Zastrow ) @ 1pt.

1 stand of Grenadier Infantry. @ 4 pts.

3 stands of Line Infantry. @ 3pts = 9pts.

1 stand of Cavalry @ 2 pts.

1 stand of Light Artillery @ 1 pt.

Note: At this time British troops were auxiliary to the Hanoverians on the continent. A number of histories combine the two as “ The British Army”.  However King George was Elector of Hanover and in The Kings eyes it was Hanover first.

 The situation is not helped by the fact that the British and Hanovarian Infantry uniform was very similar. The British fielded approximately 16,000 on most occasions with the bulk of the army being Hanovarian with some from Hesse..

THE AUSTRIAN “ BRIGADE” OF PRINCE CHARLES OF LORRAINE: 27;000 = 27pts.

1 General and C-in-C  ( Prince Charles ). @ 1 pt.

1 stand of Grenadier Infantry. @ 4pts.

4 stands of Line Infantry @ 3 pts. = 12pts

2 stands of Light Artillery @ 1 pt = 2 pts.

4 stands of Cavalry. @. 2pts. =. 8pts


THE BATTLE;

* The French retain the Initiative Point for the entire battle.

* The rivers Jeker and Meuse can only be crossed via the bridges or the pontoon bridges. Any stand being forced into one of the rivers is lost.

* The French army is moved first on the first Game-Turn,  BUT NOT Clermont,s Brigade within Liège. Clermont,s Brigade can be moved as normal from the second  to the eighth Game-Turn.

* Although the French retain the Initiative point for the entire battle, both sides still have dice thrown to determine which side moves first, fires first and wins any tied results.

* If any stands suffer a “ move back” as a result of firing or combat, and cannot be moved back, that stand is removed from play.

* There are two patches of Broken Ground in front of the Austrian position. Stands cannot be moved into those particular squares.

* The game is played for Eight Game-Turns. The French win if they can cause more casualties than they suffer in points. If the points are equal, the French  also win if they can take the villages of Rocoux and Varoux.

HISTORICAL NOTES:

Maurice De Saxe ( Maurice of Saxony ) was one of the pre-eminent Commanders of his time. Unfortunately there was nobody on the Allied side to match him. The Austrian commander Prince Charles did have combat experience is did Waldeck and Zastrow, but they were all basically pedestrian, as was the Duke of Cumberland.

 Sir John Ligonier was a rare Officer who could take in the “big picture”. There is no evidence for it, but seeing the situation the Allied army was in, I am sure it was Ligonier who had the pontoon bridges constructed and arranged for the army baggage to be sent over the Meuse. 

The battle was a victory for the French but did not cause the complete destruction of the Allied Army as Saxe had planned. On the morning of the battle, there was fog and drizzle, which delayed the French attack. Eventually as the Allied centre gave way. De Saxe sent orders to Clermont-Gallerande to attack the Austrian position.


This was meant to impede any Austrian support to the centre. But Gallerande waited two hours before commencing the advance, allowing the Austrians to cover the retreat of the army over the Meuse.

There were political consequences to this battle. Maurice was a Saxon and although he had the full backing of Louis the 15th (XV ) none the less, the French Officer Corp resented taking orders from an outsider. In the wider Political world, major Alliances were starting to fray.

At the eventual Peace talks France was forced to hand back all its conquests. Through British connivence Austria was forced to underwrite Prussia’s conquest of Silesia. Although the War of the Austrian Succession had a few more years to run, both the French ( allied to Prussia) and Austria ( allied to Britain) felt that they had been hoodwinked.


Thus the stage was set for the next great conflict as France and Austria, enemies for at least the previous 300 years themselves became allies. The “ Diplomatic Revolution “ as it was later termed was to set Europe on its head and pre-empt the Seven Years War.

CREDITS:

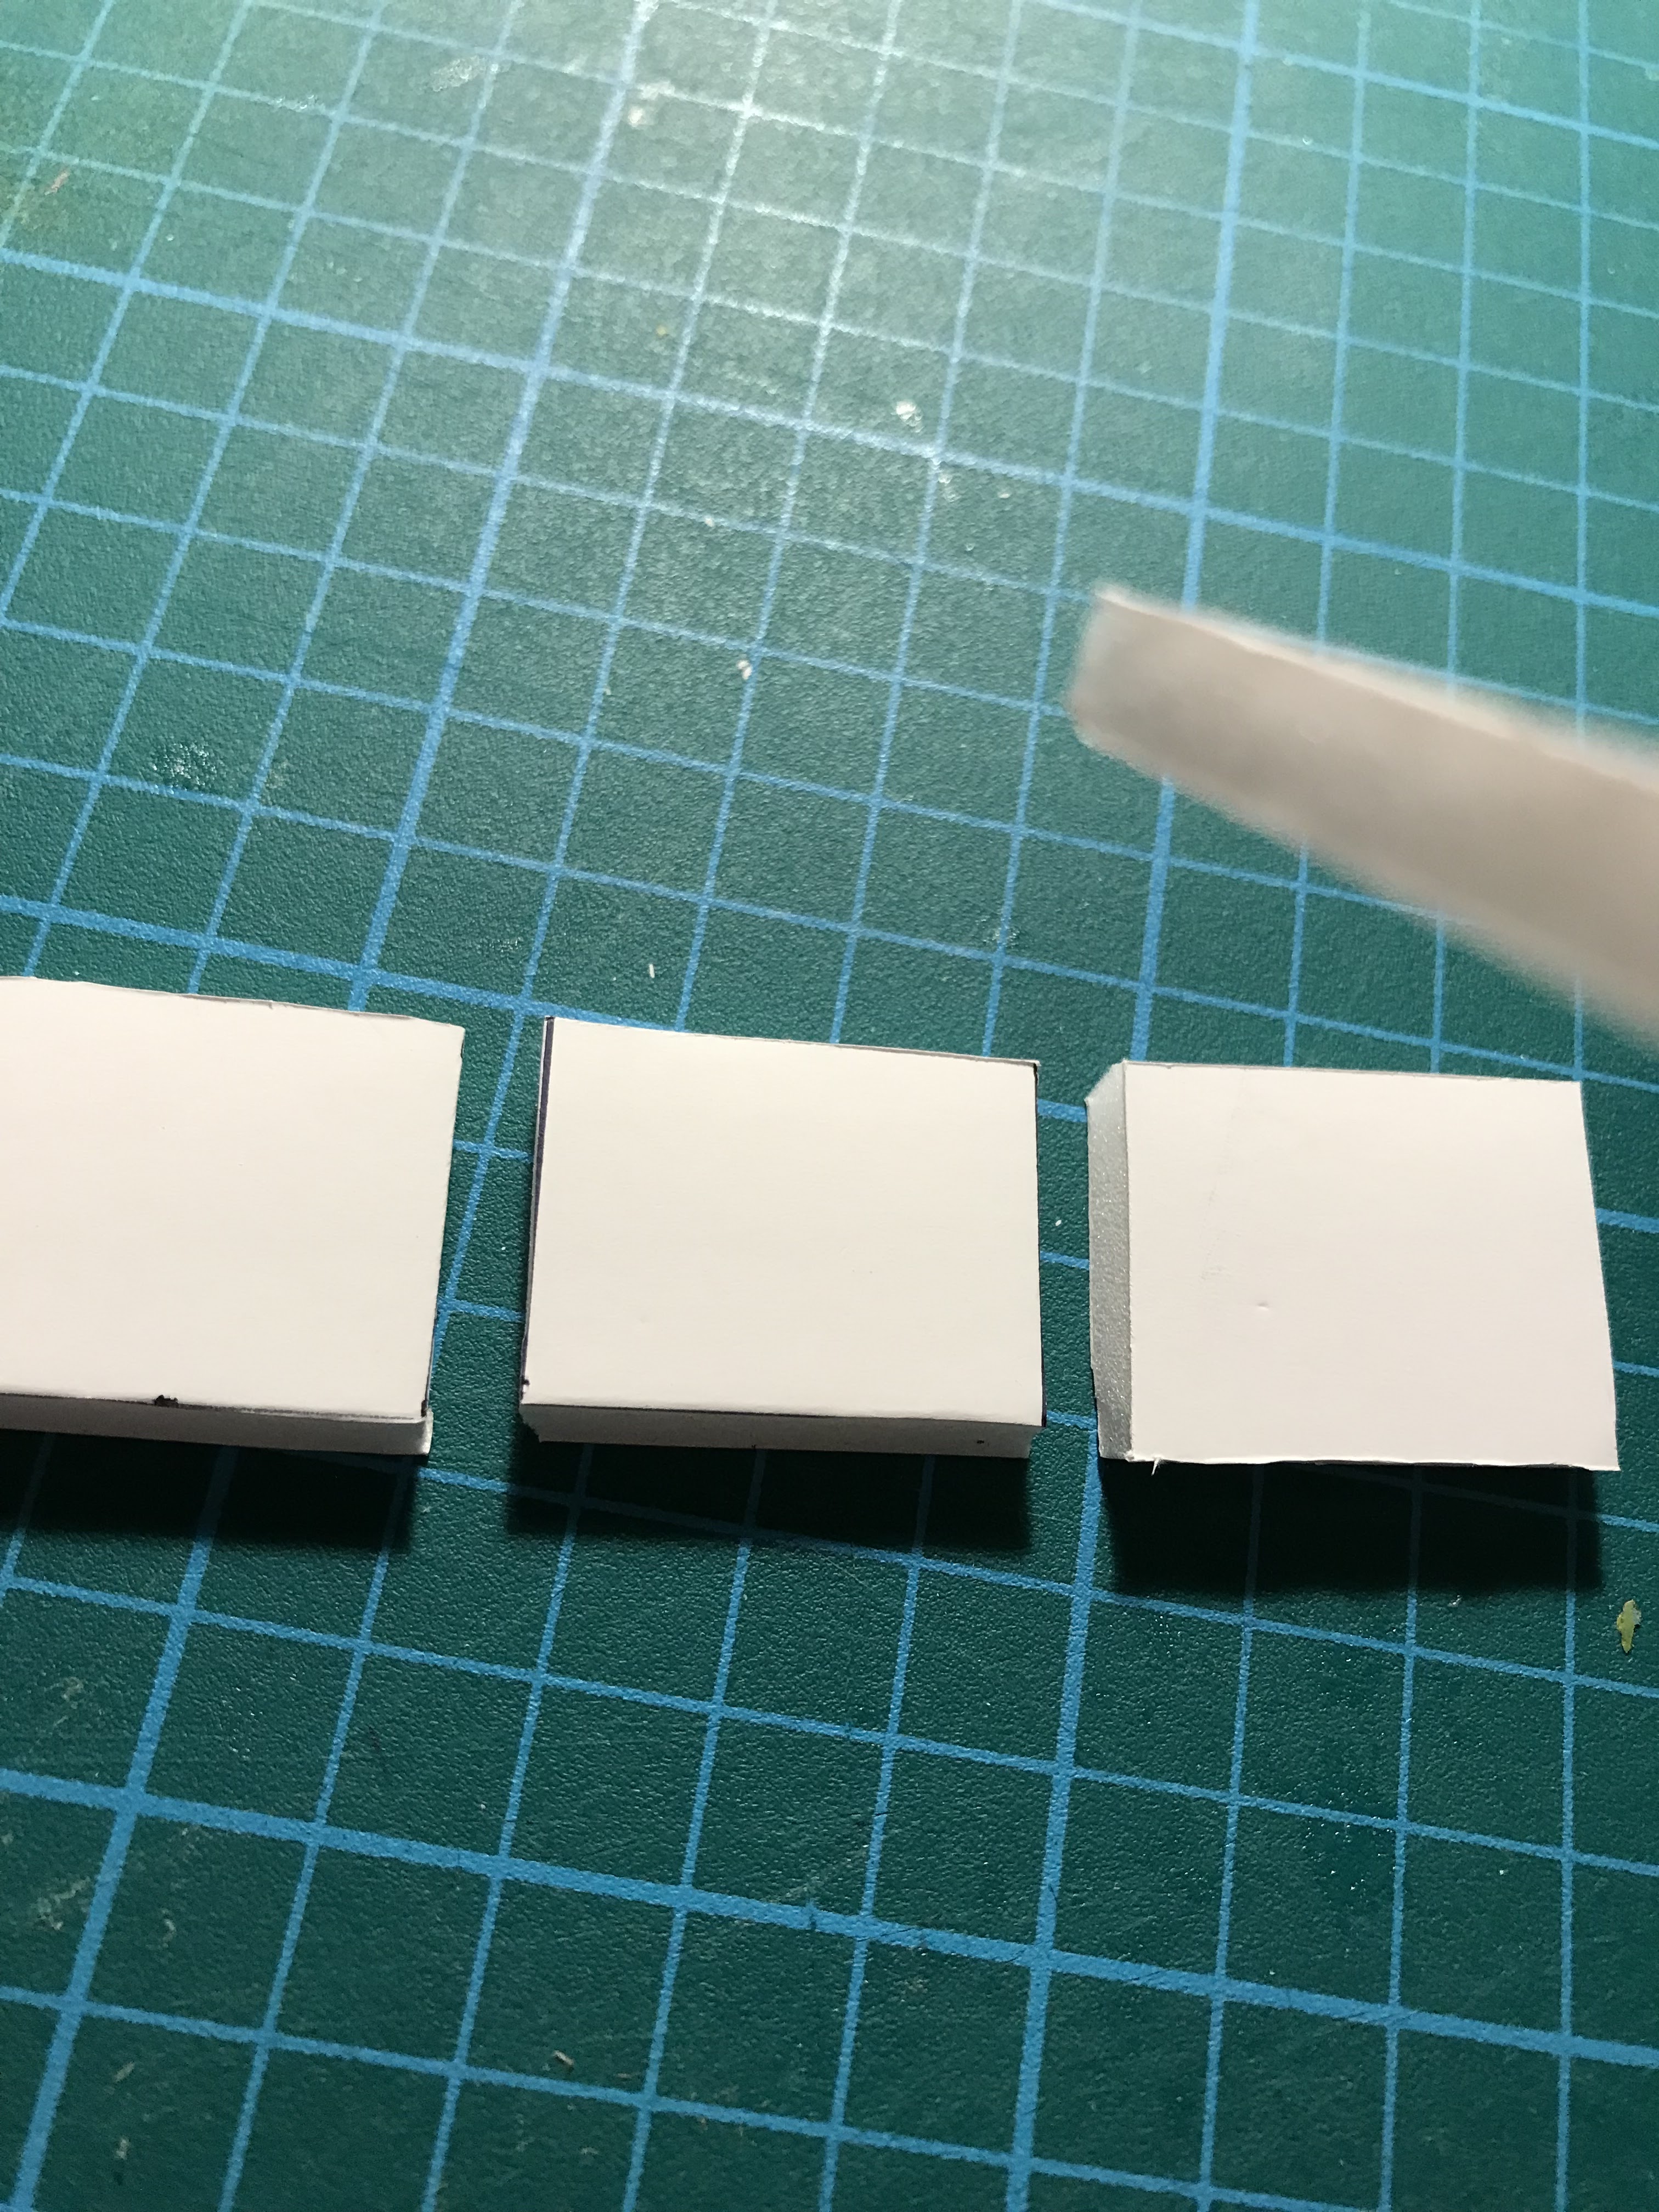
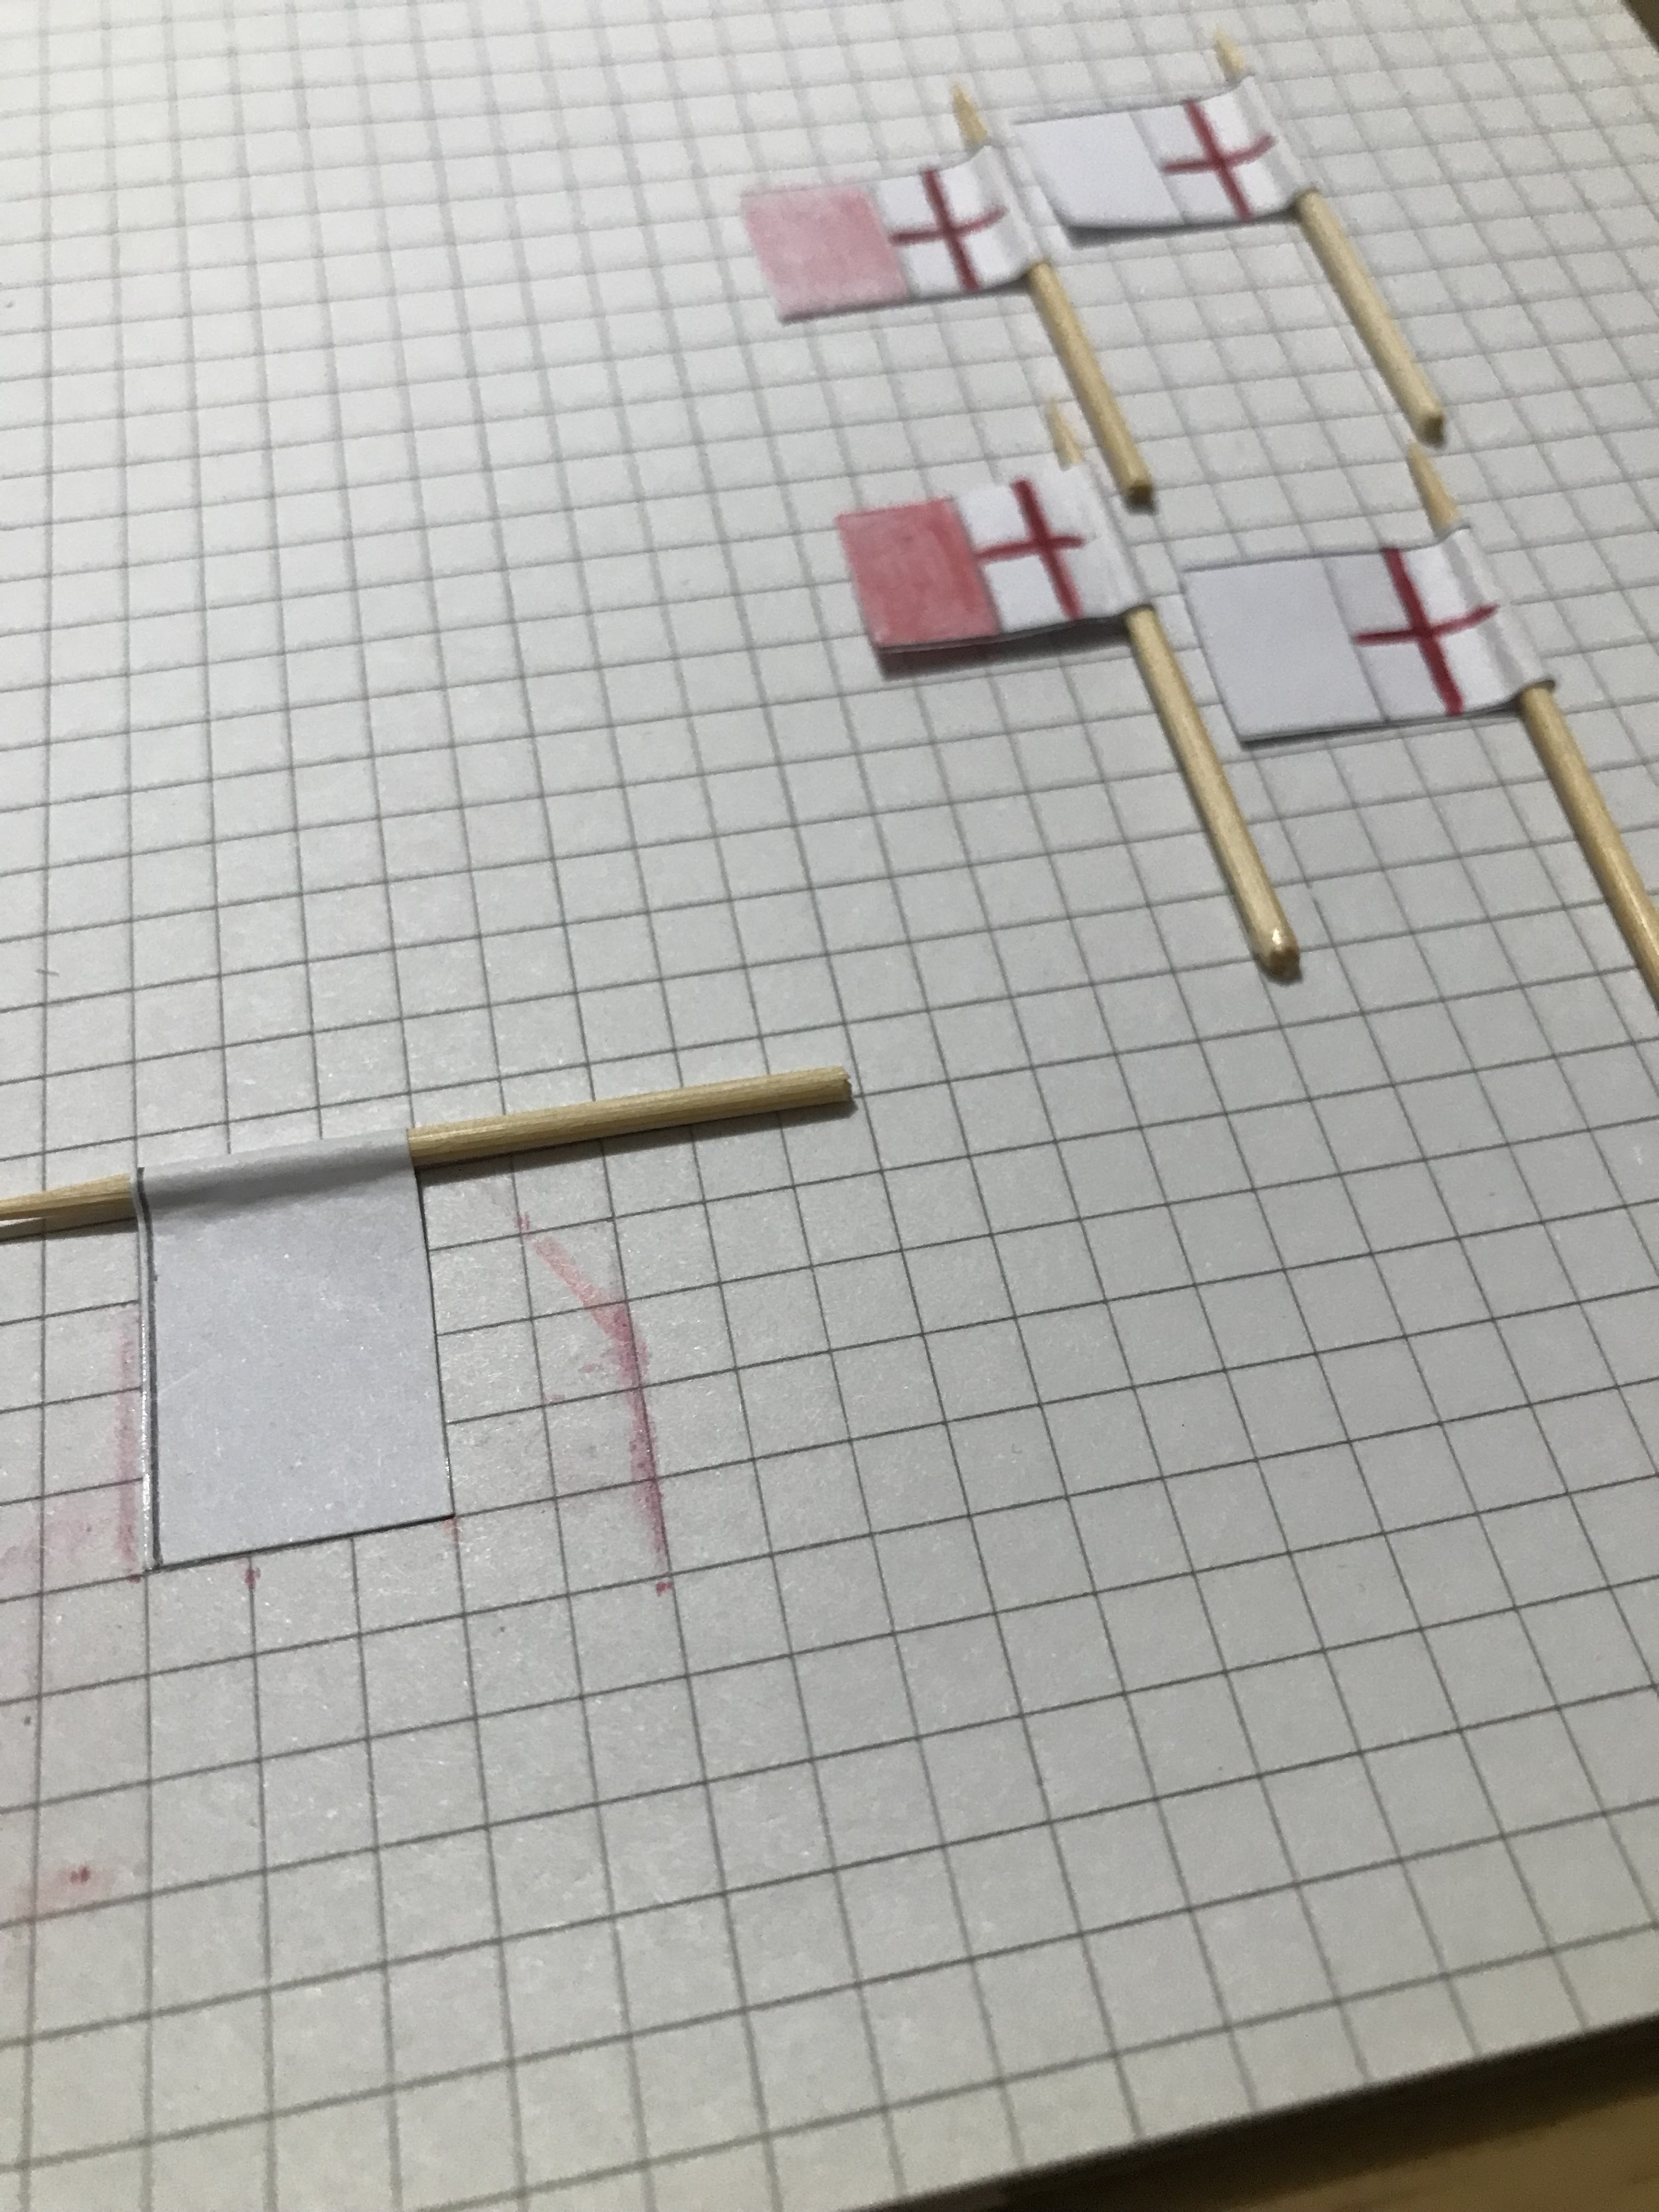
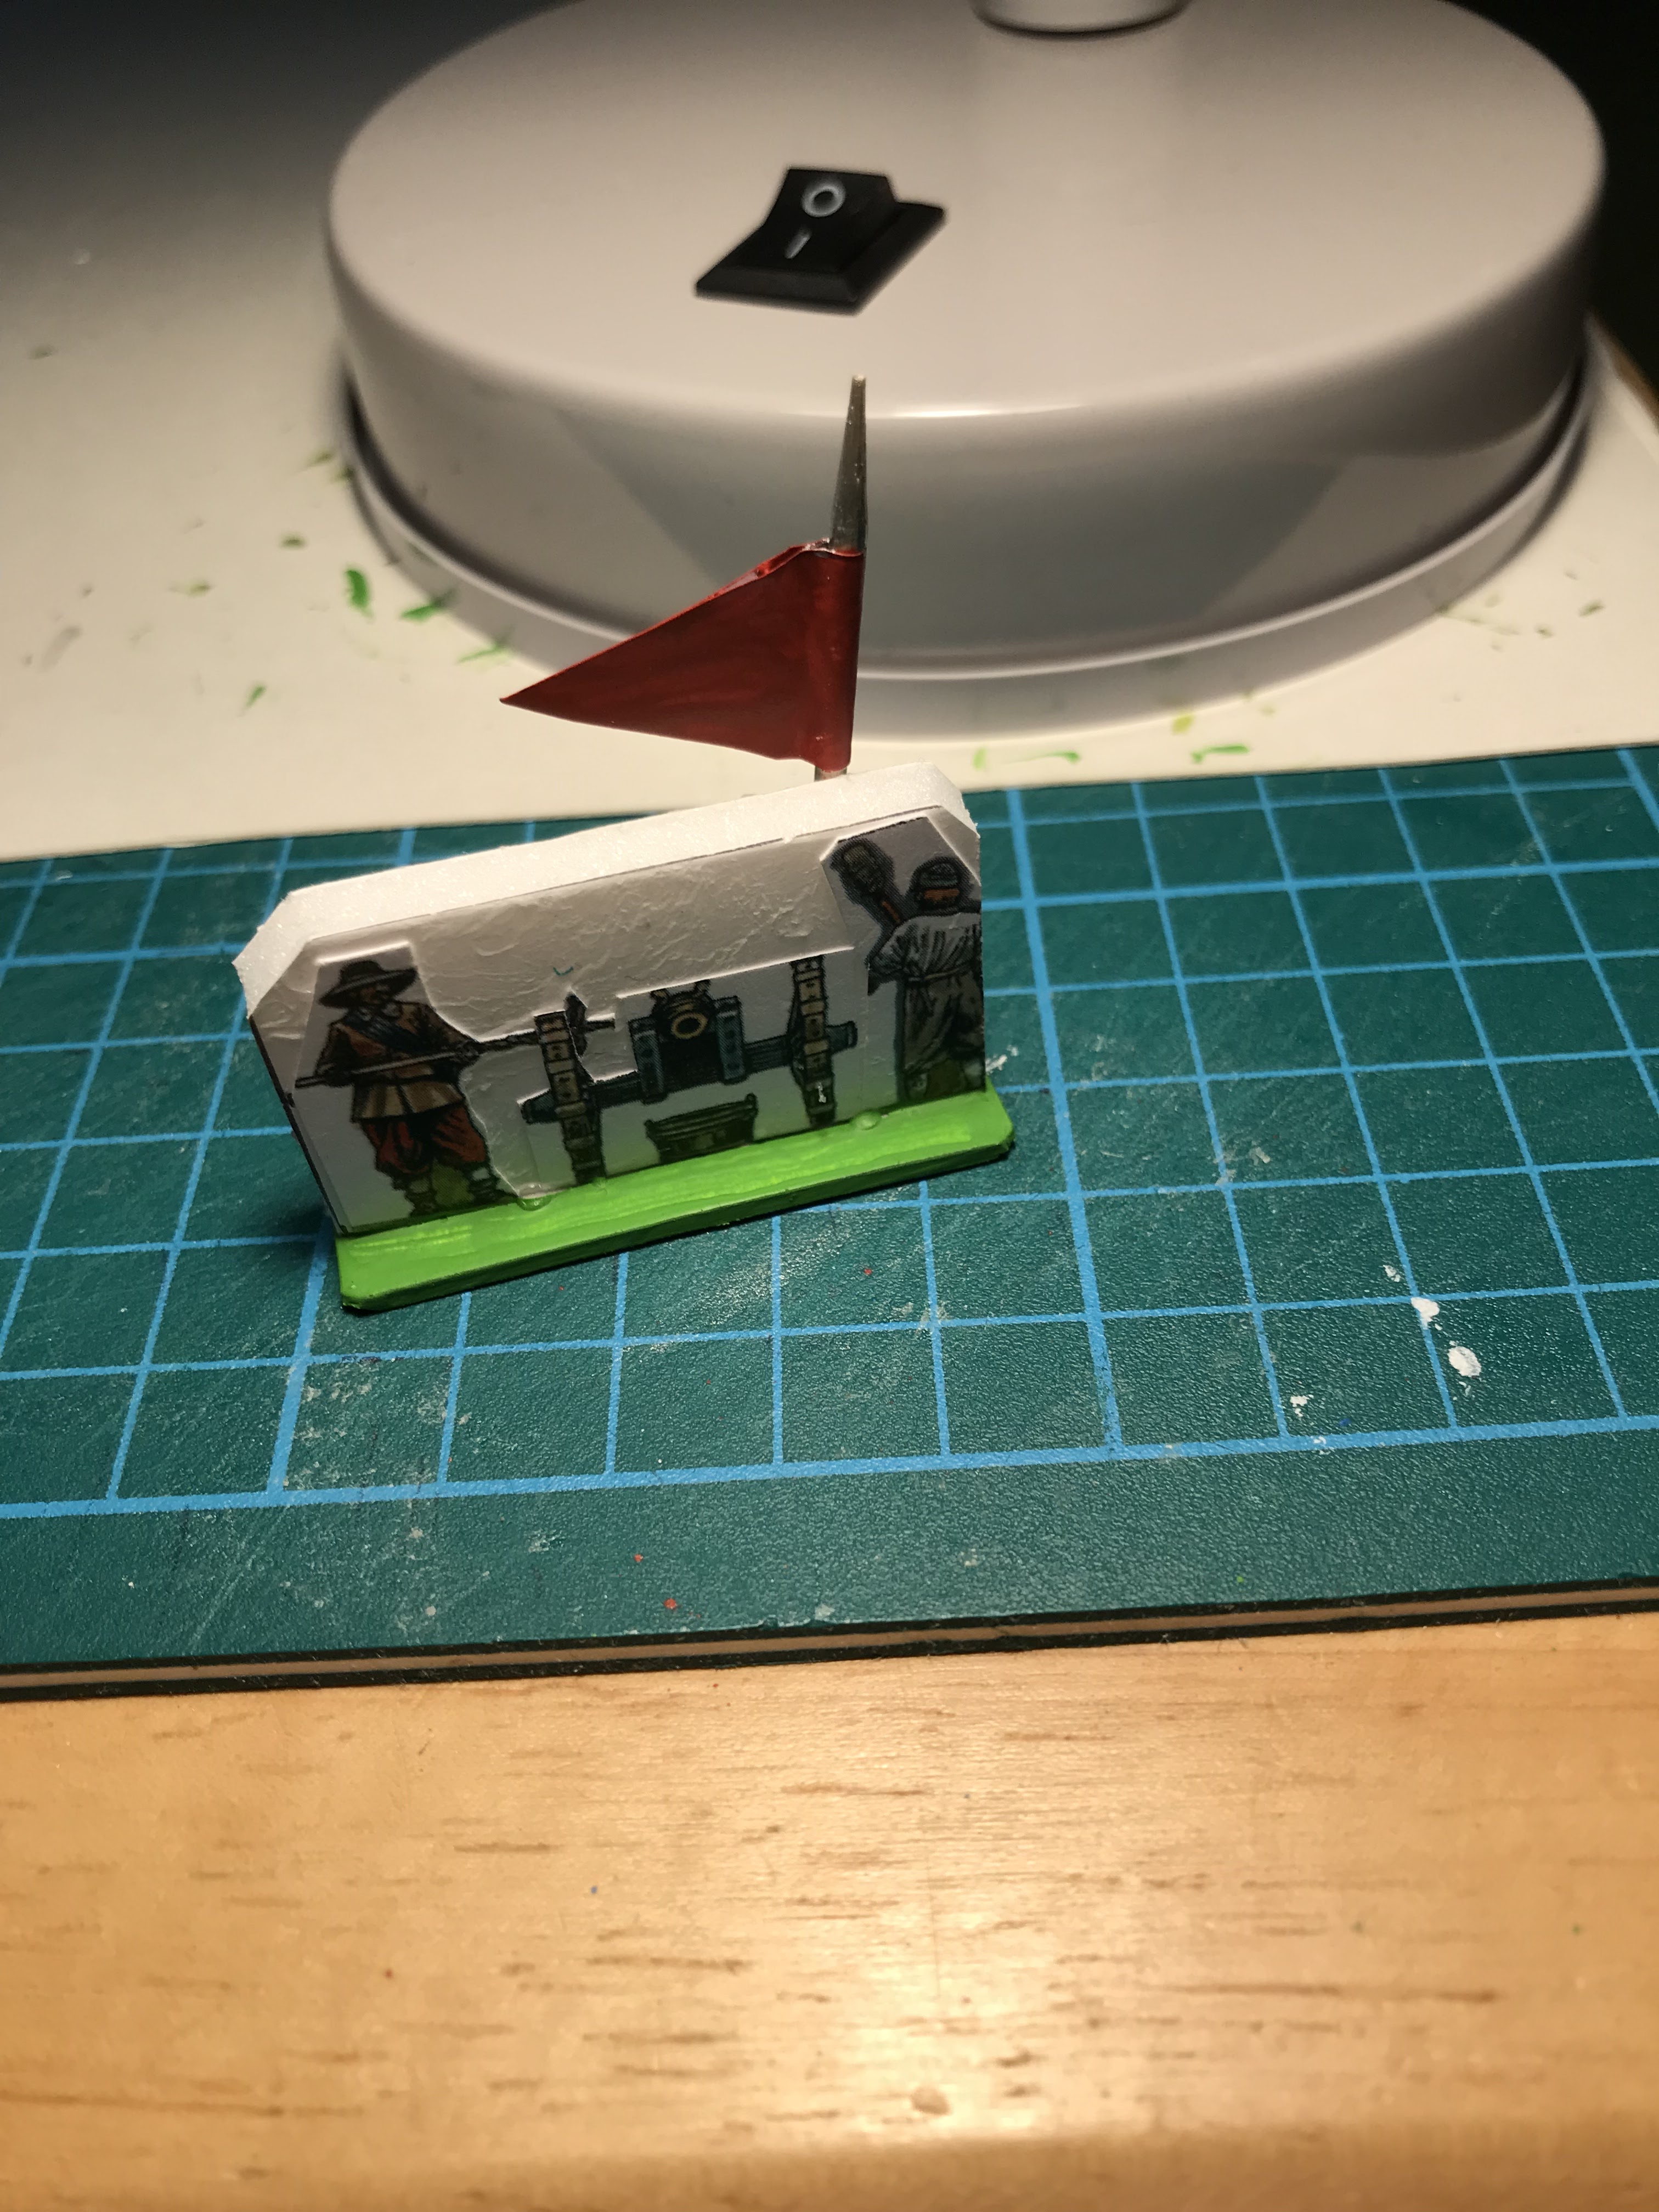
The figures are mostly Miniature Figurines, with Peter Pig and some Essex Miniatures. The flags are hand painted on masking tape. The bases are 1mm picture-framing cardboard.

The two-storey buildings were bought from Total Battle Miniatures. The two villages were scratchbuilt from the picture framing cardboard, as were the pontoon bridges. The hill was made by Brian at Essex Miniatures ( recently resprayed.).

The trees were made by various manufacturers. The roads and river were cut from thin card, the field sections are cut from pan scrubbers as is the broken ground.


My Mums ancestors, the Lane Family, were part of the group that helped King Charles 2nd escape after the battle of Worcester in 1651. Her Majesty Queen Elizabeth 2nd has passed away today. May Her Majesty Rest In Peace.

Sunday 3 July 2022

Battle of Edgehill October 23rd 1642.

This article is my interpretation of this battle. Any mistakes are my own.

In the five years prior to the battle, political and confessional confrontation had been building between the Monarchy and Parliament. Having already lost the Bishops War with Scotland, Charles 1st became increasingly frustrated by Parliament constantly bringing in Laws to curtail Monarchical power

Charles 1st believed in the Divine Right of Kings, and with that in mind he decided to exercise that right. On the 4th of January 1642, Charles marched into the House of Commons with a company of armed Infantry. He had a warrant for the arrest of five M.P,s.

These men knew of the impending intervention, and had managed to slip away. In the five days after this event the citizens of London became hostile to the King. Charles left the Capital and made his way to York where he set up his Headquarters.

In the next nine months both sides collected supporters and troops. Parliament had a head start by securing the Trained Bands of London and the Arsenal at the City of Hull. Portsmouth had also been seized giving Parliament control of the Navy. Meanwhile, Charles had sent his Wife, the Queen Henrietta to France to raise troops and weapons.

All these actions culminated in two armies facing each other at Edgehill----------

The Battle;

My previous Blog detailed the assembly of the Paperboy paper figures of Peter Dennis to foamboard blocks. It is these figures I am using in this reconstruction.

Optional Rule;

Normally, under the TABLE TOP BATTLES rule system, only one stand is allowed in a square. Using the blocks, TWO INFANTRY OR ONE INFANTRY AND ONE GENERAL,   OR, ONE CAVALRY AND ONE GENERAL stand are allowed within a square. Cavalry and Artillery remain at one per square.


Only the front INFANTRY stand can fire or fight in combat. However, if there is a Pike block in the same square behind the front Infantry, the Pike can also be included in the Combat.

*If a " moveback " is required after Firing or Combat, both stands must be moved back. The rear Stand still counts as " Support ".

THE ROYALIST ARMY;  15,000 = 15 points x 4 = 60 pts.

11,000 Infantry = 11 points x 4 = 44 pts.

22 points of Pike = 7 stands @ 3pts + General Wilmot @ 1 point.

22 points of Muskets = 11 stands @ 2 points.

3,000 Cavalry = 3pts x 4 =12 points.

5 stands of Cavalry @ 2 points + King Charles @ 1 point + Prince Rupert @ 1 point.

1,000 Dragoons = 1 point x 4 = 4 points.

3 stands of Dragoons @1 point + Lord Byron @ 1 point.

THE ARTILLERY;

20 Guns each with 12 gunners = 240 men. = 0.240 x 4 = 0.960 r/u = 1 point = 1 gun model.


THE PARLIAMENTARIAN ARMY.; 15,000 = 15 points x 4 = 60 points.

12,000 Infantry = 12 points x 4 = 48 points;

21 points of Pike = 7 stands @ 3 points.

27 points of Muskets = 12 stands @ 2 points +Earl of Essex @ 1pt + Sir John Meldrum @ 1 point + Sir William Balfour.@ 1 point.

2,000 Cavalry = 2 points x 4 = 8 points;

4 stands of Cavalry @ 1 point.

2 stands of Regular Cavalry @ 2 points

1,000 Dragoons = 1 point x 4 = 4 points.

3 stands of Dragoons @ 1 point + Sir James Ramsey @ 1 point.

ARTILLERY;

30 Guns each with 12 gunners = 360 men = 0.360 pts x 4 = 1.440pts r/d = 1 point = 1 Gun model.


Historical Notes;

* The Royalist Army was initially positioned on Edgehill. When the Parliamentary Army under Essex maintained its position near Kineton the King ordered the advance downhill onto flatter ground. Therefore, the Royalists move first on the first Game-Turn. Game-Turns two to eight will be diced for as per normal.

* The Royalists keep the Initiative Point for the entire battle.

* The Artillery cannot move from their respective positions. In the battle, the Artillery had little effect.

* If any stand retreats up Edgehill it is lost from play.


* I’ve included the roads for completion. In this scenario the roads do not give the plus one move advantage.

* In the battle the Cavalry of both sides fought their own battle. Therefore, Cavalry cannot attack Infantry and vice versa.

* If the King is killed or captured, the battle immediately finishes as a win for Parliament. If a Parliamentary Cavalry or Dragoon stand attacks the King and forces a “ move-back”, the King is captured! ( The Kings Life Guard had gone off to fight in the front rank on the right, so the King only had a small group of Courtiers with him. A troop of Parliamentary Cavalry attacked the Kings party during the battle, and managed to grab the Royal Standard. However Sir Edmund Verny cut off the hand of the Parliamentary assailant during the defence of the King and regained the Standard,! ).

CREDITS:

* As previously stated, I used photo copied illustrations from Peter Dennis’s book of the English Civil War ( currently available from www.helion.co.uk ).

* The hills were made from Foamboard. The trees were photocopied from the book and glued to Foamboard. The white areas on the tree illustrations were painted with Powder Blue paint from Miniature Paints.

* The hedgerow sections are made from pieces of pan scrubber glued to thick cardboard.

* The waggons were made from cocktail sticks and cardboard with buttons as wheels.


* The village models were made from Foamboard and cardboard. Sections of photocopied buildings from the book were glued to the Foamboard and painted in places with Miniature Paints Olive Green.


* I’ve included some photos of the battle which I played Solo. As a slight change, I played this battle on a dining table, on a 3 foot x 2 foot ( 90cm x 60cm ) piece of felt cloth with a 2 inch square grid drawn onto it.


Sunday 12 June 2022

The Paperboys of Peter Dennis and the English Civil War.

 Some years ago my Wargaming activities involved the 17th century. Both the Thirty years War and the English Civil War occupied the time of myself and my mates. The European theatre we gamed with 25mm figures, however the English War was the main event.

Having sold my 25mm figures ( fiscal paucity was a constant back then), I bought a load of 6mm figures. The Matchlock rules came from using them.


A mate of mine came up with a campaign with three of us as Royalists and three as the Roundheads. The large battles were fought with the 6mm figures and the skirmishes with the 25mm stuff. Well, I was Charles 1st and even though we just played it as a campaign, well, you know what happened to me!

Anyway, I digress. Roll on 34 years and once again, I feel drawn back to this conflict. This time though, I didn’t want to collect and paint the figures! I had purchased Peter Dennis’s book on the English Civil War, and it had been on my bookshelf for a while. When published, Peters books drew a bit of negative press, not for the content which is excellent.

No, it was the thought of printing and cutting out all the paper figures, that didn’t appeal to a number of people including myself. Each figure or group of figures has a front and back like the stickers in the Command and Color’s games. That’s when I had this idea. Why not make the blocks out of foam board stuck on cardboard!

I got some pages printed up. ( Peter has given his permission for personal use in the book.) I cut them out and stuck them on blocks. Well it works. So, here’s how

1) The first item is to get your pages printed. I went to a Printers and asked for three copies of all the pages of the figures. I had this done in A5 to reduce the size a bit, on 100gsm paper

2) Material items required ;

       PVA glue

       A Pritt stick ( or any paper glue ).

       A packet of cocktail sticks.

       A packet of  self adhesive labels.

       2 or 3 sheets of A4 Foamboard.5mm thick.

        A length of rubber tubing 4mm x 1mm.

        Some picture framing stiff cardboard.

        Some pots of acrylic paint ( optional) ;

        Blue, Red, Green and Silver.

        A sheet of graph paper.

       A packet of dressmaker pins.

    Note; Most of the above can be obtained from local stores or from Amazon.

TOOLS REQUIRED;

A good crafting knife ( young people should ask a parent ).

A good pair of scissors ( young people should ask a parent ).

A pair of wire cutters. ( otherwise known as “ small side cutters” ) these are for cutting the cocktail sticks and clipping the corners of the bases.

A cutting mat. ( If you can get one of these it saves a lot of measuring).

A pair of tweezers.

3) THE INFANTRY AND DISMOUNTED DRAGOONS.

I cut these blocks first from the Foamboard, 25mm high ( 1 and 1/8th inches ) by 30mm wide ( 1 and 5/16th inches). 36 are required for two armies.


Next, I cut the bases from the picture-framing cardboard. These are 15mm deep (6/8ths )x 40 mm wide ( 1 and 11/16th inches ).

For the DRAGOONS, the bases are 20mm deep (7/8ths of an inch ) and 40 long ( 1 and 11/16ths inches ).

You will notice that I have clipped the corners of the bases. This stops the cardboard from “ fraying “ and makes the cardboard more durable.


Once the blocks and bases were cut, I started on the illustrations. I cut these out less the green bases. This is where you need to keep an eye on the pairs ( back and front.)

Once these were cut, I then used the Pritt stick on the blocks gluing the illustrations. Be aware that once the illustration is laid on It Is On!


Once all the Infantry were glued to the blocks, I glued the blocks to the bases using the PVA glue. You can be a bit generous with the glue because it shrinks and drys clear. It takes a while to dry. Put these to one side.

THE DRESSMAKER PINS;

If your cutting is a bit wonky like mine then this is where the pins come in. If the block won’t stand up straight when using the PVA, put a pin in in the base and push it gently against the block until it’s vertical and leave to set.


THE PIKEMEN;

The Pikemen are stuck to the same size blocks. When they are dry, stick them to the bases as for the Muskets. Once they have dried for the second time, cut 4 cocktail sticks to 40 mm. (1 and 11/16ths )

Glue on the cocktail stick’s by putting some PVA glue on the hand and on the base. Once done leave them to set. The next part was to paint the tips in silver. On the body of the pike,I painted a blob of blue or red paint then a blob of Flesh colour to show a hand.


THE CAVALRY AND MOUNTED DRAGOONS;

The same procedure is followed for the cavalry and Dragoons. The foam blocks are 30mm ( 1 and 1/4 inches ) x 30mm ( 1 and 1/4 inches ). The bases are 15mm deep ( 6/8ths of an inch ) x 40mm wide ( 1 and 11/16th inches ). Again, making sure you have the back and front pairings, use the Pritt stick to glue the illustrations to the blocks. Any overlaps go to the bottom. I trim these up before gluing the blocks to the picture framing cardboard with the PVA glue.

THE DRAGOONS;

Again. These bases are 20mm deep (( 15/16ths) by 40 mm long.(1 and 11/16ths ).


THE ARTILLERY;

These blocks are 25 mm high (  1 and 1/8th inches )by 45mm wide ( 1 and7/8th inches ).The illustrations are a bit tricky because the crew are separate from the cannon so a little more work is required. The bases are 15mm wide ( 6/8ths ) by 45 mm wide ( 1and 7/8th inches).


THE COMMANDERS;

The Commanders are separate along with some standard bearers so, sizes vary according to composition. They are 35mm high ( 1 and 1/2 inches)  and between 30 to 45mm wide ( 1 and a 1/2 inches to 1 and 7/8ths inches ).The bases are 15mm wide ( 6/8ths of an inch ) and up to 45 mm long ( 1 and 7/8ths inches ). Some of the Generals are drawn with two arm positions. Using the craft knife carefully remove one arm.


Once you have assembled the blocks, it’s time to think of flags and about painting——or not, depending how much work you wish to do.


THE FLAGS;
 I cut the cocktail sticks to 50mm. ( 2 and 1/16th of an inch).The flag strips are cut from labels 15mm wide.( 6/8ths).


I used graph paper to line up the crosses on the flag


I drew the crosses onto the flags with a red ballpoint pen. The rest of the flag surface I painted in blue and red. When this had dried, I painted the tips in silver. The Dragoon flags were rounded at the ends to help with identification. The artillery flags I cut like a pennant.


THE FLAG HOLDER:
While the flags are drying, I glued 10mm ( 9/16ths ) pieces of rubber tubing to the back of the stands with the PVA glue.


Once all the stands are dry, they can be painted if required. I used Game Workshops Moot Green, but this is personal choice. I painted one side, of the top surface, let it dry then painted the other side.


The army is now assembled


I have assembled these two armies for my own Table Top Battles ruleset where one stand sits in a square. However, if you like the larger formations ( or larger armies)with the chance to represent line and column the stand sizes will allow for this.

You can also enhance the blocks with a bit of light shading. There are also Infantry and cavalry Command groups included amongst the illustrations allowing Regimental actions.

Peter has done other books on different Eras. These two armies took me two weeks doing an hour/ 2 hours every day. I must admit it was good not having to paint loads of figures ( my time is limited these days ). If this might suit your gaming have a look on www.helion.co.uk and type “Peter Dennis” in the search box.

 Peter has done a number of books on different eras of British history. Now I’ve done the armies, a few battles are in order!

Ps. I’m hoping Peter will create Macedonian Successors, Galatian’s, or even Early Carthaginians and Greeks!