Showing posts with label 2 inch grid. Show all posts

Wednesday 28 September 2022

Battle of Abukkin 2260AD. Swabia. Esper. [ Sci~Fi ]

 Extract from the diary of  Lieutenant George Smith;

Well, the day started ok. Orders came from The Colonel. Arrange for one battery of Artillery to travel out to Abukkin for some practise firing. The local Heta [ the Town Council ] had given permission for the firing.

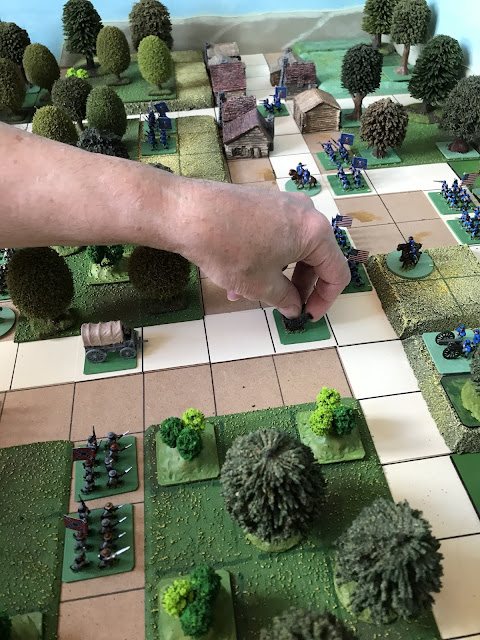
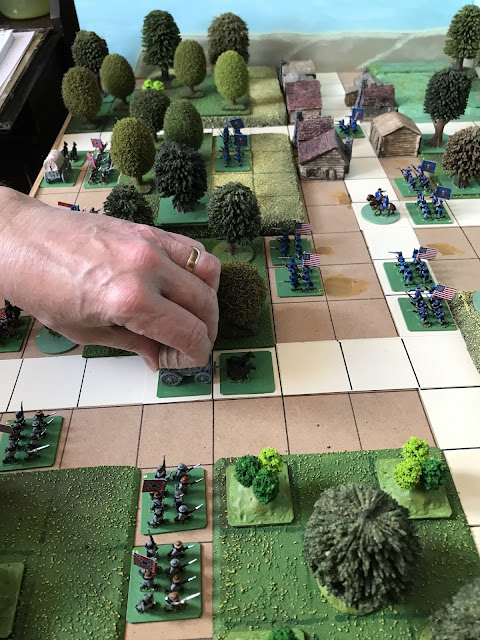
Captain Rawlinson decided to take a Security Detail with him, four platoons with four Blower APC,s. a small Detail as trouble wasn,t expected. Captain Rawlinson had the camp set up and the firing line established. Just as the fire order was about to be given, the men were stunned to see strange vehicles approaching their position.

At first, the men were wondering what was happening. The Esperans were known not to have any sort of advanced armoured vehicles. As soon as the "Alien" vehicles opened fire, that decided the issue. Captain Rawlinson didnt know what or where they came from, but they were firing on his position so "they" were the enemy. He ordered the guns to target the vehicles. The infantry piled into the Blowers.

The Artillery tried to return fire but our men took heavy casualties. We have managed to get some drone photographs.


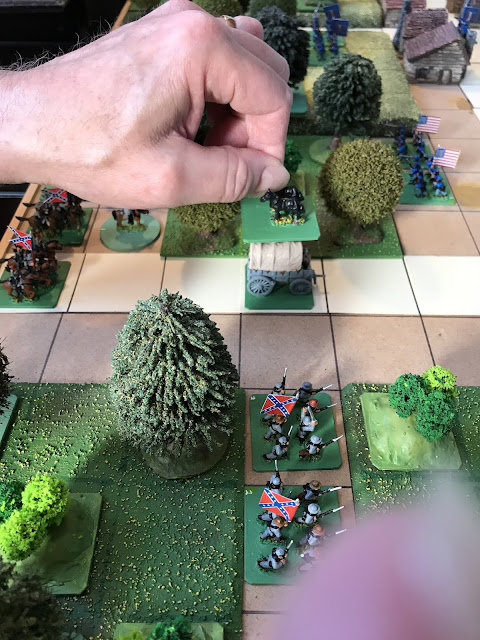
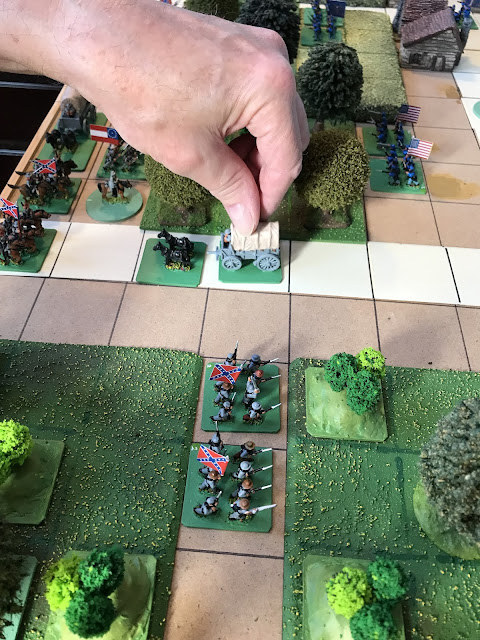
The Artillery engaged the Alien vehicles at long range but failed to stop them. The blowers moved out but the weaponry was not powerful enough to penetrate the armour. The survivors made it back to Fort Wellington in the remaining vehicles. The “ Aliens” did not pursue the survivors. The people of Abukkin scattered into the woods.

An enquiry has been ordered to find out why the Orbital Guardships never gave any warning of incoming hostiles!. In the meantime we now have to find out who these attackers were and where these hostiles have gone!———.


PLAYING NOTES:


HUMAN DETACHMENT;

4 stands of  Towed Artillery: Defence 3/ Attack 5  total 8 x 4 = 32.

2 stands of  Lorry Transports: Defense 3 / Attack 3 = 6 x 2 = 12.

4 stands of Blower Armoured Personnel Carriers: Defense 4 / Attack 5 = 9 x 4 = 36.

2 stands of Infantry with Flak Armour and Heavy Weapons: Defense 3 / Attack 4.= 2 x 7 = 14.

2 stands of Infantry with Flak Armour and Rifles:  Defense 3 / Attack 3 = 2 x 6 = 12.

TOTAL: 106 = Morale total = 53.

ALIEN FORCE;

2 stands of Tanks: Defense 5 / Attack 5. = 2 x 10 = 20.

4 Armoured Personnel Carriers ( each carrying two stands) Defense 5 / Attack 4 = 4 x 9 =36.

6 stands of Infantry with Rifle: Defense 3 /Attack 3 = 6 x 6 = 36 points.

2 stands of Infantry with Heavy Weapons: Defense 3 / Attack 4 = 2 x 7 = 14 points

TOTAL: 106 points = Morale total = 53.

THE BATTLE,

* The battle is played for 8 Game-Turns.

* The side losing the battle will have either have lost more stands than the opposition and/or suffered a collapse in Morale.

* The river can only be crossed via the bridge.

* The battle is played out on a 3 foot x 2 foot ( 90 cm x 60cm ) table.


CREDITS:

The figures and vehicles are all 6mm. The Human Infantry, Blower APC,s and Artillery Crew are from Brigade Models (listed as “ A Mercenary Company” ). The Human Vehicles are from Alternative Armies Bradley Fighting Vehicles range.

The Alien Infantry are from the Kra’vak range from Ground Zero Games. The vehicles are entitled “ Orbital Knight Vehicles” which were obtained from the Etsy website online. Two of the vehicles have scratch built turrets made from buttons, plasticard, and plastic tubing.


The bases are 40mm x 40mm and cut from 1mm picture framing cardboard. The trees are by various manufacturers.. The hills are a mix of those made by Brian of Essex Miniatures and some scratch built from cork tiles. The village buildings are scratch built from picture framing cardboard as is the bridge. The roads and river are made of thin card. The fields are made from pan scrubbers.


The above is a section of the map of Esper. The “x” marks Abukkin. Circled is Destioa, the town where Fort Wellington has been established.


Sunday 24 October 2021

Moving Waggons and Arcs of fire.

 When writing a set of instructions for Wargaming you like to think you have covered all the angles but it is very rarely the case.

Some waggon models are to long to put on a single stand. Therefore, the waggon has to go on one stand and a team of horses on another. The two must be in adjacent squares.

Here is an instruction should you wish to use it.

1) Move the horse stand in the direction of travel .

2) Move the waggon up to the adjacent square behind the horses. 

3) Reversing the direction of travel. Reverse the horse stand. Move the horse stand one square ( on top of the waggon), then a further square. Movement of the horse stand then stops.

4) The waggon is then reversed on the spot to match the direction of the horses.


5) On the next movement phase of the next Game-Turn the Waggon moves as normal.

All this sounds a bit convoluted but in real life if enough room was available you can turn a waggon team around but as with a car so with horses.

This is reflected in the fact that when the horse stand is reversed over the waggon. It can only be moved two squares instead of the normal four.

There must be two squares vacent for the horse's and wagons to move. If using this system, it stands to reason that without the horses in an adjacent square to the front, the waggon ( or gun ) cannot move!.

The above instruction allows for horse teams within the restricted space of a small wargame table. The same instruction could be used should you wish to use limber teams on a separate stand from artillery pieces.

ARCS OF FIRE.

A stand has a 90% arc of fire to its front. If there is an object, or a friendly stand in the adjacent square to the front the stand is blocked from firing even on the diagonal.

The above picture shows a confederate infantry stand unable to fire even on the diagonal because the adjacent front square has woodland in it.

The next picture shows the same confederate stand. This time, after movement, the stand has been left with an open space in the front adjacent square. This means that it can fire on the diagonal at the Union infantry within its 90% arc of fire


The facing of the stand is very important at the end of its intended move, and could leave the stand at a disadvantage if not attended to!

The waggon and team is Peter Pig. The figures are Peter Pig and Miniature Figurines. The Union gun and crew is Peter Pig.


Tuesday 30 June 2020

Battle of Fraustadt; 3rd February 1706 : Western Poland.

On a cold February morning in 1706, two armies faced each other across a  frozen plain. Facing East, a combined army of Saxon and Russian troops in a prepared position.

Facing West, a much smaller but very determined army of Swedish infantry and cavalry. There were no artillery pieces amongst these formations as their General, Rehnskoild had decided on a very rapid advance.

The two armies differed in composition. The Swedish army had all the cavalry and very little infantry. The Saxons along with their Russian allies had the infantry and guns, but very few cavalry.

Why was this?. Further East, the Swedish army led by their King, Charles 12th, besieged the Russian held town of Grodno. He had most of his infantry with him. The Saxon commander King Augustus " The Strong" had taken most of his cavalry in an attempt to break the siege.

General Schulenburg, the Russo- Saxon General left Saxony to attack what he thought would be a very weak Swedish battle group. On that cold February morning he had a very rude awakening.

Rather than retreating, that weak Swedish army led by a very resolute General had decided to attack!!

This is the opposing forces;


Saxony-Russia.

10,300 Saxon Infantry and artillerymen.
2,700 Saxon Cavalry.
40 Field Guns.
5,000 Russian Infantry.

Total: 18,000 = 18 points x 3 = 54 points.

The Saxons;
8 stands of Line Muskets @ 2 points each = 16 points.
2 stands of Pikemen @ 3points each = 6 points.
4 stands of Heavy Field Guns @ 2 points each = 8 points.
4 stands of Line Cavalry @ 2 points each = 8 points.
1 General ( Schulenburg ) @ 1 point.

The Russians;
4 stands of Line Muskets @ 2 points = 8 points.
1 stand of Pikemen @ 2 points = 2 points.
1 stand of Grenadier Muskets @ 3 points.
1 General ( Goltz ) @ 1 point.

The Swedish Army;

6,000 Cavalry.
4,600 Infantry.

Total; 10,600 = 10.6 points x 3 = 32 points ( rounded up).

1 General Rehnskoild @ 2 points.
1 General Von Krassow @ 1 point.
1 General Hummerhelm @ 1 point.

6 stands of Line Muskets @ 1 point each = 6 points.
2 stands of Pikemen @ 3 points each = 6 points.
8 stands of Line Cavalry @ 2 points each = 16 points,

Here is a map of the battle;


NOTES:
With a battle such as this where there are a disparity of forces special rules have to be introduced. The circumstances themselves played a part also.

● The Swedish stands are moved first on every Game-Turn.

●The Swedish Army gets the Initiative Point every Game-Turn.

● On every Game-Turn every Stand of the Swedish Army can be moved if desired. Before the Saxon-Russian Army can move, a 12 sided die is thrown. The result of the throw is the number of stands within the Saxon-Russian army that can be moved including Command stands. The type of stand to be moved is at the discretion of the player.

This rule is used because, during the actual battle there no clear command decisions being made within the allied army.

● The only stands that cannot be moved are the Russian Guns. If a gun stand suffers a " Move Back" as a result of firing it is given a "cannot fire" marker ( or a marker of any description ) which remains in play for that Game-Turn. If the Gun Stand suffers a "Move-Back as a result of Combat, it is removed from the table altogether. ( the crew have been killed and the gun dragged out of position).

● During the Firing Phrase of every Game-Turn, the Swedish Army always fires first, with every stand that can fire. The Saxon-Russian Army has a 12 sided die thrown for it. The result will show the number of stands that can fire. Any Artillery stands that are to fire are included in that number.

● Combat is played out as normal. The Swedish horses did not have shoes fitted so a number of them fell over on the icy ground during the advance,but this did not seem to effect their attack.

Removing a Defence-work;


The front of the Russo-Saxon army was cover by sections of Chevau-de-Frise. If a Swedish infantry stand is adjacent to a section at the start of a Game-Turn with no enemy stand adjacent to the same section, the Swedish stand can try to remove it.
Roll a 6sided die. If the result is 3,4,5 or 6 the section of defence work can be removed.

Final thoughts: When I read about this battle, French Grenadiers and line infantry were mentioned as being present in the Saxon ranks but as there was no further information on the actions of these units I have not included them in the initial deployment.
The battle was fought on a 3 foot x 2 foot ( 90cm x 60cm ) table of 2 inch ( 50mm ) squares.

The Winner.
This will be the side with the lower number of stands lost at the end of eight Game- Turns.
If both sides are equal in the number of stands lost, the Winner will be the side which lost the least total of points in stands lost.

CREDITS;

The figures are a mixture of Miniature Figurines and Peter Pig. The Chavau-de-Frise sections are from Irregular Miniatures.

The flags are pieces of masking tape roughly hand painted by myself.
The buildings were painted and supplied by Total Battle Miniatures.
The trees were from Amazon and decorated with a snow paint by Tamiya and a snow kit from www. Scenics.com
The log sections were from Blotz ( I think?)
The snow field, river and roads were made from sections of thin cardboard bought from Wilkinson and The Works ( two local stores).
The backdrop and square 40mm bases were made from picture-framing cardboard supplied by The Works.
Finally. The round 40mm command bases were supplied by Minibits.

Monday 6 April 2020

The Battle of Friedlingen. Breisgau 14th October 1702.

As the War of the Spanish Succession unfolded, military formations of The Hapsberg Empire moved to cover the crossings of the river Rhine and to threaten Alsace.

In order to break this deadlock the French King sent an Army through Huningue across the Rhine into Breisgau.

South of the river Weisse the country belonged to the Swiss. The French General, De Villars had previously  sought permission from the Cantons to pass through their territory in order to execute a wide flanking march to the North East. Permission was denied.

Although De Villars could see that he had limited space to deploy his Army,  he still led his forces out to do battle. If he was to win, the situation would undermine the Austrian blockade of the Rhine crossings.

The Imperial Austrian Army;

9,000 Infantry = 9 points x 4 = 36 points.

5, 000 Cavalry = 5 points x 4 = 20 points.

C-in-C; Louis William of Baden = 1 point.
General Claude De Mercy = 1 point.

Fort Friedlingen;

1 Heavy artillery stand @ 2 points.
1 stand of Line Infantry @ 3 points.

In the field;

2 stands of Grenadier infantry @ 4 points = 8 points.

7 stands of Line Infantry @ 3 points = 21 points.

4 stands of Line Cavalry @ 3 points = 12 points.

3 stands of Line Dragoons @ 2 points = 6 points.

2 stands of Light Artillery @ 1 point = 2 points.


The French Army;

6,000 Cavalry; 6 points x 4 = 24 points.

11,000 Infantry; 11 points x 4 = 44 points.

C-in-C; Claude Louis Hector De Villars = 1 point.
General Desbordes = 1 point.

Garrison of Huningue;

1 stand of Grenadier Infantry = 4 points.
2 stands of Heavy Artillery @2 points = 4 points.

Field Army;

6 stands of Line Cavalry @ 3 points = 18 points.

2 stands of Line Dragoon Cavalry @ 2 points = 4 points.

11 stands of Line Infantry @ 3 points = 33 points.

3 stands of Light Artillery @ 1 point = 3 points.

Notes;

●The French Army moves first on the first Game-Turn. All subsequent
Game-turns are diced for.

● The River Canderne can be crossed by infantry and cavalry. The artillery
must cross by the bridge.

● Any French stands forced to enter the River Weisse will be lost.

In the original battle  the French Infantry pushed up Tollingen Hill as the Austrian Army advanced.

De Villars had to intervene when his infantry started to retire under pressure from the Austrians opposite their position.

The Austrian Cavalry put in a half - hearted charge but soon retired.

Fort Friedlingen was also known as Fort De  Etoile or the Sternschanze ( Starsconce). According to an old map I've seen it is portrayed as a rectangular star shape.

I used a rectangular fort- style building. There was a marshy stream running
parallel with the base of the hill West of fort Friedlingen and I have portrayed part of it.
Any unit moving into the marshy ground can only move one square per game-turn.

Here is the map;


Some of the information presented here, I wasn't sure about but the battle seems to work so I I'm  going with this;


Once again, the battle is on a 3 foot x 2 foot board and the figures are a mix of Miniature Figurines and Peter Pig. The table is shown from the Austrian position.
Here's a few more;


Sunday 22 March 2020

The Battle of Mollwitz Silesia; 10th April 1741.

On the death of her father, Maria Theresa became Empress of Austria.Prior to his death, Charles the 6th had tried to get the heads of Europe to sign up to the Pragmatic Sanction. This was an agreement whereby they would honour his eldest daughter as heir to the throne of Austria.

Of course no sooner had Maria Theresa been crowned than the storm clouds gathered. Chief amongst the potential protagonists was Frederick 2nd of Prussia.

His father had also recently passed away and in ascending the throne decided he wanted to transform Prussia into a major Political power.

First he made political overtures to the new Empress expressing his desire to became protector of her domain. Having spent time on assurances, he then sent his army into Silesia itself, all the time reasurring the young Empress of his best intentions, and to protect her interests.

However, the young Empress was not to be fooled and understood the Prussian troop movements for what they were. An invasion by stealth.

To Maria Theresa and the members of the Hofkreigsrath  ( the military council ) there was no alternative but to declare war thus starting the War of the Austrian Succession. Silesia was the " Jewell in the Crown " of the Hapsberg family inheritance, and could not be lost.

April 1741 found the Prussian army scattered in cantonments across Silesia. The snow was still on the ground and Frederick and his Generals were not expecting any movement from the Austrian forces.

Therefore the abnormally fast advance by 18,000 Austrians under General Neipperg caught the Prussians by surprise. However having moved so rapidly Neipperg then encamped his army near Mollwitz giving Frederick chance to react.

On the 10th of April 1741, having successfully united 20,000 of his troops. Frederick marched his Army toward the Austrian positions. The King caught the Austrians napping and could have attacked while the Austrian army was unprepared.

However, this was the Kings first battle and gave orders for his army to be arraigned  into a formal battle line. This gave Neipperg time to hastily assemble his forces into position.

The Prussian Army.

General Kurt Christoph Graf von Schwerin = 2 points.
General Count Adolph Friedrich von Der Schulenberg. = 1 point.
Colonel von Posadowsky = 1 point.

16,000 Infantry ( 16 points x 3 = 48 points ).

4,000 Cavalry ( 4 points x 3 = 12 points ).

30 guns = 3 gun models

Infantry;
2 stands of Grenadier Infantry @ 4 points =8 points.
11 stands of Line Infantry @ 3 points = 33 points.

Cavalry;
6 stands of Line Cavalry @ 2 points = 12 points.

3 stands of Light Artillery @ 1 point = 3 points.

Austrian Army;

Field Marshall  Neipperg =1 point.
General Carl Romer = 2 points.
General Berlichingen = 1 point.

10,000 Infantry ( 10 points x 3 = 30 points.)

8,000 Cavalry ( 8 points x 3 = 24 points )

20 guns = 2 gun models.

Infantry ;
2 stands of Grenadier Infantry @ 4 points = 8 points.
9 stands of Line Infantry @ 2 points = 18 points.

Cavalry ;
1 stand of Heavy Cavalry = 4 points.
6 stands of Line Cavalry @ 3 points = 18 points.

2 stands of Light Artillery @ 1 point = 2 points.

This is the map ;


The Austrian General Neipperg had spent time in a military prison. He was held responsible for losing a previous battle against the Turks. Therefore, having been given the chance to redeem himself he wanted to attack.

Fredericks army was a new force and the King felt ready to test his troops and himself under fire. The Infantry were drilled to perfection. However, the Cavalry has always played second fiddle to the Infantry. Neither Frederick nor his father had any indepth knowledge of cavalry manoeuvres and used  the Cavalry for decoration rather than any practical use. Some of his troopers were so untrained that they were frightened of their horses.

General Carl Romer knew the Prussian Horse were sub standard so launched a cavalry advance. This was how the battle started.

This is how the table looks before the battle commences;


Notes;

● The Austrians move first on the first Game-turn, after which all subsequent Game-turns are diced for as normal.

● The Kleiner Bach can be crossed in normal movement as it had no effect on the movement of troops.


At one stage of this battle the Prussian infantry were struggling and thinking defeat was imminent, General von Schwerin urged the young King to quit the field. Frederick rode away thinking the worst. However Schwerin managed to rally the Prussian Infantry who eventually overcame the Austrian cavalry then the Infantry.

This is why Frederick is not represented on the table as it was Schwerin who controlled the infantry and instructed the young King.

Frederick never forgave Schwerin for sending him away, and vowed never to leave the battleground again.

In fact it was observed that the Austrian infantry seemed to wilt under the disciplined fire of the Prussian troops.

Also,one of the best Generals of his time, General Romer of the Austrian Army lost his life leading the Cavalry in the attack.

Well, the rest is history. The figures in the photos are mainly Miniature Figurines with some Peter Pig figures. All 15mm.

I used to have a massive collection for this era. I now have small groups of stands assigned to various states. Thus the Prussian army is composed of Prussian, Brunswick and Wuttemberg troops.

The Austrians are helped by Saxon, Reichsarmee and Bavarian troops.

This is a set-piece battle and when played out could go either way. As always the table is 3 feet by 2 feet. The buildings representing the village's are scratch built with cardboard.

As always, this is my interpretation of the actual battle.


Monday 24 February 2020

Plastic n' Metal The Late Roman Era.

Well, I have an interest in the Late Roman Era.
I am not an expert painter of figures, and often I have been up against the clock.

Therefore my style is very basic. I use 20mm plastic, mainly Hat and some Miliart. I also mix in some metal Newline Designs as being 20mm these seem to fit  with the plastic figures.
I think a company called Tumbling Dice also make 20mm metal figures for this era.

To prep the plastic;

1) I wash them In warm soapy water scrubbing
them lightly with a nail brush.

2) I then assemble the figures with shields and spears, and attach any cavalry figures to their horses.

3) The figures are then glued to cardboard strips.

4) Next, I undercoat the figures with PVA glue. This can be watered down a bit. This stops the paint flaking off. I then leave the figures to dry.

5) Once dry, I completely coat the figure brown paint.

6) When the paint drys I go through the figures
putting on various colours.
Having wrote that, I use a minimum number of
colours and rotate them.

7) Once the paint is dry, I brush on some gloss acrylic varnish. Again I water it down a bit if needed.

8) I don't worry about flocking the base. I just paint a basic colour on.

9) Having done that, I base the figures.
It's basically (for me ) about getting the figures on the table.

Here are some illustrations;

These are a mix of Hat Goths and Miliart German Tribesmen.


Hat Industries Cataphracts. The Spears are from North Star Miniatures Javelins.


Hat Sassanids. The flags are scratchbuilt. North Star javelins.
The standard on the light cavalry archers is a dressmakers pin.
The round bases are 40mm mdf from Minibits.


These figures are Newline Designs Late Roman Infantry ( metal) painted in conventional fashion with North Star javelin.


These are Hat Industries Huns.


These are part of my Pict army. The cavalry are from the Hat Goth cavalry.
The chariot is from the Hat Celtic chariot box, using some twine for the reins.
The hooded crossbow are from Hats Enemies of Rome box.
The Pictish infantry are from Redbox and the archers are from Hat Saxons, part of the Enemies of Rome box.
Apparently it was not unusual to find Saxons amongst the Picts.


This was my attempt to recreate the Del Riata ( the people of the chariot). They had a thriving society on the West coast of Ireland and the East coast of Scotland.
The chariots are from Hat Celtic Chariots with converted occupants.
The infantry are from Hats Gothic Infantry. Over time the Del Riata merged with the Picts.


I found myself with too many Sassanids. This is because I had bought Hats Parthian cavalry before they released their Sassanid range! So the Palmyran army came into being!.
All from the Hat Sassanid and Parthian range. The standards are made from masking tape. 


This is Zenobia!. Made from the bottom half of a camel rider from a hat box of Arab camels and the top of a figure from a Hat Celtic Chariots.


Supply wagons and civilians. The middle waggon and mules are from Ceaser miniatures Roman Waggon train set ( I think there are 4 different ones).
The civilians come from the same sets as are the oxen. These look large but apparently this breed were large in real life. The spearmen are from Hats Gothic range. The wagon with the big wheels is scratch built. I used cardboard for the body.

The wheels are made from pre-cut sponges that you put on the bottom of chair legs.
They come in sets and sold in D-I-Y stores. Once I stuck them on, I painted them black
and painted on the rims and spokes. The Goths used waggon lagers and nobody make any. I'm hoping Hat will do some one day.


Sassanid War Elephants. These are from the Hat range. Hat were going to produce actual models but these went on the back burner. Those shown are from the Carthaginian set. The mahout is the body with a Sassanid head. The archer is Sassanid but I had to pack out the Howdah with a piece of eraser.
The heavy cavalry are Sassanids.

These were known as the Savaran. During sieges they fought dismounted.
In the field a Sassanid army was nearly all cavalry and elephants.


These are Newline Designs Goth Cavalry. The spears are North Star Javelins.
The standard is my own paint job on masking tape.


 Lastly, these are Hat Auxilliary Infantry. They could easily be used for later Goths or Saxons. As the Roman empire started to break apart foreign Auxiliaries struck out on
their own as they were not being paid.

That is the best part of this Era. You can mix and match western armies. In the 400,s and 500,s there were very few pitched battles. If there were more they went undocumented, so there is an opportunity for a few " what if " scenarios, especially
concerning the Arthurian legends.

Also, there is recent evidence to suggest that although the Federated troops broke away from the Roman Army some of the men had basic engineering or surveying skills. As people are finding out the Dark Ages were not so Dark after all.


Thursday 2 January 2020

Battle of Klissow : Poland-Lithuania July 9th 1702.


This is another battle of  the Great Northern War where an outnumbered Swedish army took on a larger force. However a few incidents happened which favoured the Swedes in winning this battle and I have tried to reflect this in the reconstruction.

The Swedish Army;

Infantry ; 8000 = 8 points x 3 = 24 points.

Cavalry ;  4000 = 4 points x 3 = 12 points.

Artillery ; This was available but was left trailing in order to get the army into battle formation as soon as possible.

1) General Carl Gustav Rehnskiold= 1 point.
2) General Knut Goransson Posse   = 1 point.
3) General Frederick 4th Duke
of Holstein-Gottorp = 2 points.

4 stands of Line Cavalry @ 3 points = 12 points.
7 stands of Line Muskets @ 2 points = 14 points.
2 stands of Pikemen @ 3points = 6 points.

Saxony Army.

Infantry ; 7000 = 7 points x 3 = 21 points.

Cavalry ; 9000 = 9 points x 3 = 27 points.

46 guns ( ÷10 ) = 4 guns.

A) General Adam Heinrich von Steinau = 1point.
B) Johann von Der Schulenburg = 1 point.
C) Jacob Heinrich von Fleming = 1 point.

Poland

Cavalry; 5000 = 5 points x 3 = 15 points.

Winged Hussars 1,250 = 1.250 points x 3 = 4 points.

Polish Infantry 660 = 0.660 points x 3 = 2 points.

D) General Hieronim Augustyn Lubomirski = 1 point.

7 stands of Saxon Line Cavalry @ 3 points = 21 points.
2 stands of Saxon Light Dragoons @ 2 points = 4 points.
10 stands of Saxon Line Infantry @ 2 points = 20 points.
4 stands of heavy guns @ 2 points = 8 points.

The Polish Wing.

4 stands of Line Cavalry @ 3points = 12 points.
1 stand of Line Dragoons @ 2 points = 2 points.
1 stand of Winged Hussars @ 4 points = 4 points.
1 stand of Line Infantry @ 2 points= 2 points.

Special notes;

This is another battle that needs a few special rules in order to obtain a reasonable outcome. The Swedes did win despite being outnumbered!! but the Saxons and Poles did put up a bit of a fight and I wanted to give
both sides a chance of victory.

● If cavalry attack enemy infantry within the marshy area they do not get the 3 points for attacking Infantry on flat open ground.

● Any stands moving into the marshy ground on each side of the stream plus the stream itself can only move one square each Game Turn.

●  The Saxon artillery cannot move.

● The artillery has only two squares range.

● Stands cannot be moved through the trees.

● The Nida river cannot be crossed.

●The Swedish army gets the Initiative point every Game-Turn and also moves  first every Game Turn.

● The Swedish player can move all their stands
on the movement phase. The Saxon player however has to throw a 12 sided die, the result showing the number of stands that can be, prior to the to the Saxon movement phase.

The above hopefully reflects the conditions of
the actual battle. Despite the Saxons having the
preponderance of artillery it didn't seem to affect the Swedish manoeuvres.
The Saxons attacked twice along with the Polish wing. After being beaten back twice the Swedes advanced. For some reason both Generals Fleming and Lubomirski
decided to withdraw their commands!!

The entire Polish wing plus the Saxon right wing cavalry and Dragoons left the field, leaving General Steinau's Cavalry and General Schulenbergs infantry ( which up to this point seemed to be doing little ) to fight a rearguard action!.

As the Swedes overan the Saxon artillery the guns were turned on their former owners.

● Ok, to reflect this, if a Swedish infantry stand moves into an adjacent square to a Saxon artillery stand and, the Swedes are not in combat the gun becomes Swedish!.

A couple of important points;

● Duke Frederick was mortally wounded at one point in the battle so the Swedish King himself took command of the Swedish left wing ( 2 points ).

● At the start of GAME TURN 6, All the Polish stands plus the Saxon right wing cavalry along with general's Fleming and Lubomirski are taken Off The Board! The Swedish player then moves their stands.

Winning the game.

Having played this game three times  I have found that numbers do count and, without the above restrictions the Swedes cannot win.
So, at the end of Game Turn 8, the Swedish player must have a minimum of Three Stands on the South Side of the stream within the marshy ground in order to win the game. The small red lines on each side of the map delianate how far forward the stands must be..

The Saxons win if they can prevent this.

One last historical note. This appears to be the
last battle in which the famous Polish Winged
Hussars took the field ( so it was nice to have a
historical reason to include a stand of these
famous troops on the table!!)

As before , I used a 3 foot x 2 foot ( 90 cm x 60 cm )
table with a 2 inch ( 50mm ) square grid.

Here is the map;


This is the board showing the set up;


All the figures are 15mm from either Essex Miniatures or Minifigs.

Finally, here's a glimpse of those famous horsemen from the Essex Miniatures range;