Sunday 24 October 2021

Moving Waggons and Arcs of fire.

 When writing a set of instructions for Wargaming you like to think you have covered all the angles but it is very rarely the case.

Some waggon models are to long to put on a single stand. Therefore, the waggon has to go on one stand and a team of horses on another. The two must be in adjacent squares.

Here is an instruction should you wish to use it.

1) Move the horse stand in the direction of travel .

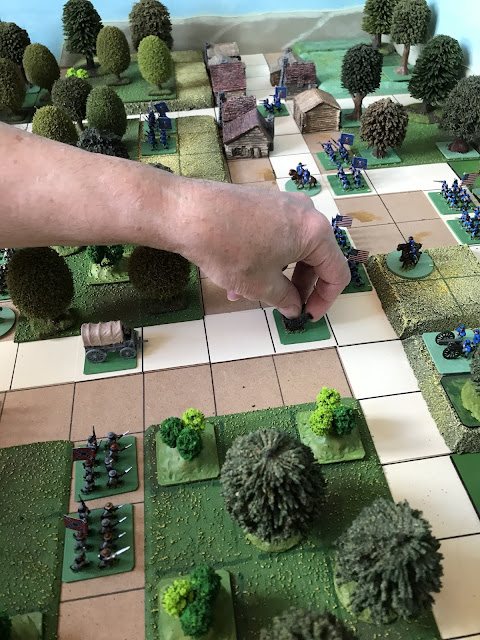
2) Move the waggon up to the adjacent square behind the horses. 

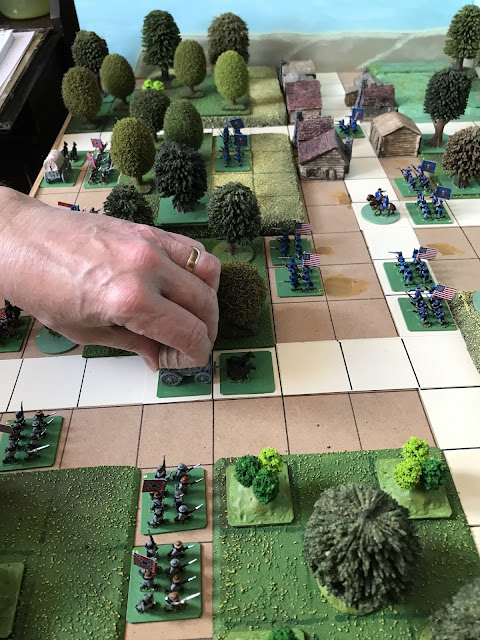
3) Reversing the direction of travel. Reverse the horse stand. Move the horse stand one square ( on top of the waggon), then a further square. Movement of the horse stand then stops.

4) The waggon is then reversed on the spot to match the direction of the horses.


5) On the next movement phase of the next Game-Turn the Waggon moves as normal.

All this sounds a bit convoluted but in real life if enough room was available you can turn a waggon team around but as with a car so with horses.

This is reflected in the fact that when the horse stand is reversed over the waggon. It can only be moved two squares instead of the normal four.

There must be two squares vacent for the horse's and wagons to move. If using this system, it stands to reason that without the horses in an adjacent square to the front, the waggon ( or gun ) cannot move!.

The above instruction allows for horse teams within the restricted space of a small wargame table. The same instruction could be used should you wish to use limber teams on a separate stand from artillery pieces.

ARCS OF FIRE.

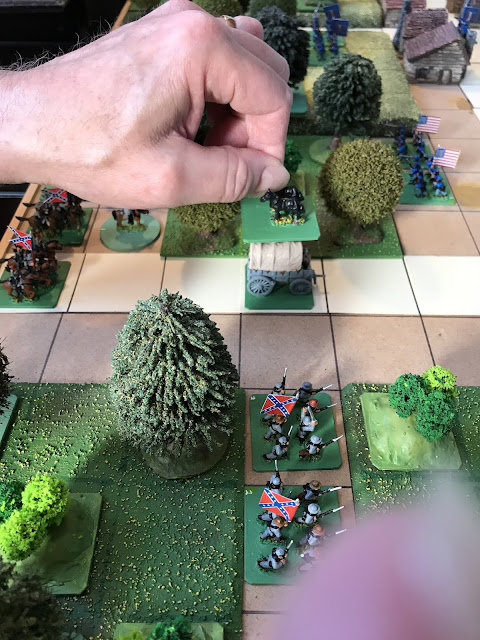
A stand has a 90% arc of fire to its front. If there is an object, or a friendly stand in the adjacent square to the front the stand is blocked from firing even on the diagonal.

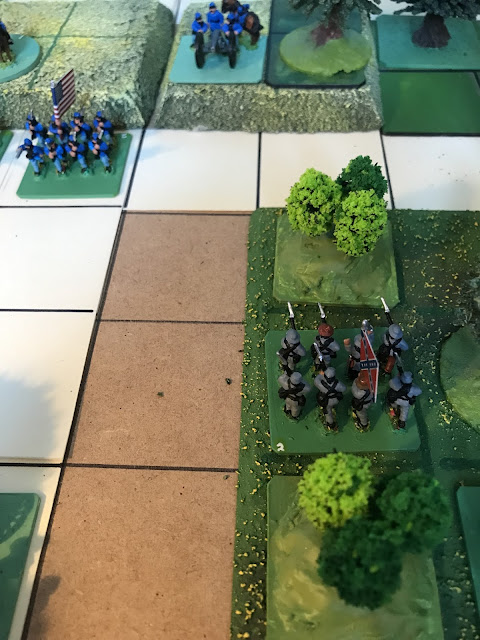
The above picture shows a confederate infantry stand unable to fire even on the diagonal because the adjacent front square has woodland in it.

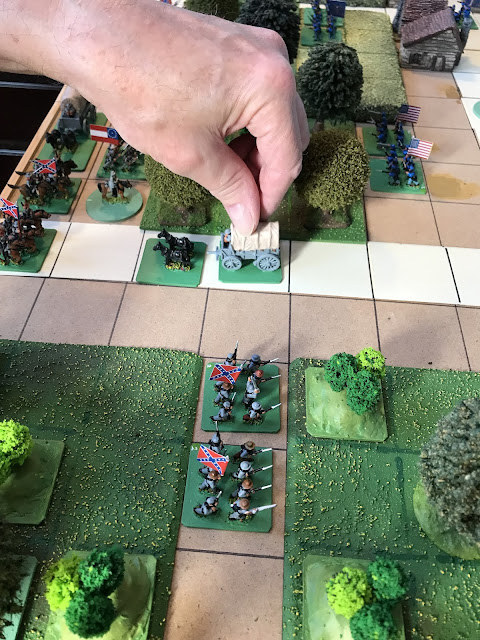
The next picture shows the same confederate stand. This time, after movement, the stand has been left with an open space in the front adjacent square. This means that it can fire on the diagonal at the Union infantry within its 90% arc of fire


The facing of the stand is very important at the end of its intended move, and could leave the stand at a disadvantage if not attended to!

The waggon and team is Peter Pig. The figures are Peter Pig and Miniature Figurines. The Union gun and crew is Peter Pig.


Saturday 23 October 2021

Battle of Dranesville; Fairfax County, December 20th 1861.

The details in this blog are my personal interpretation of  historical events. any mistakes are my own. Most of the detail I gained from Wikipedia. I had to do a bit of digging on the net for the regiments that were present but I cannot guarantee the accuracy of the list I have presented.
 
 This action was preceded by a reconnaissance and foraging operation from Centreville moving north, led by the Confederate General J. E. B. Stuart. At about the same time, General Ord of the Union army was moving his Corps east, along the south bank of the Potomac River to clear any Confederate forces from Loudon and Fairfax County.

Ord left half his Union force [ 5,000 ] at Colvin Run Mill so that he would not be outflanked. Neither force was aware of the other until both forces reached the area  south east of Dranesville. General Ords force, having driven off some Confederate cavalry piquets, was just resuming the march eastward when Jeb Stuarts force was encountered coming from the south.


UNION ARMY, 5,000 = 5 pts x 5 = 25 pts.

1 General and C-in-C [ Edward Otho Cresp Ord ] @ 1 point.
1 General [Lt Colonel Thomas Kane ] @ 1 point.


13th Pennsylvania Infantry = 2 stands of 2nd class Line Inf @ 2 pts = 4 pts.
6th Pennsylvania Infantry = 2 stands of 2nd class Line Inf @ 2 pts = 4 pts.
10th Pennsylvania Infantry = 2 stands of 2nd class Line Inf @ 2pts = 4 pts.
12th Pennsylvania Infantry = 2 stands of 2nd class Line Inf @ 2pts = 4 pts.
9th Pennsylvania Infantry = 2 stands of 2nd class Line Inf @ 2pts = 4 pts.
The Rearguard Infantry = 1 stand of 3rd class Skirmish Infantry @ 1 point.

1st Pennsylvania Cavalry = 1 stand of 3rd class Cavalry @ 1 point.
Battery A,  Hezekiah Easton. = 1 stand of Light Artillery @ 1 point.

CONFEDERATE ARMY, 3,800 = 3.8 pts x 5 = 19 pts.

1 General [ James Ewell Brown Stuart ] @ 1 point.

11th Virginia Infantry = 3 stands of 3rd class Line Inf @ 1 point = 3 pts.
1st Kentucky Infantry = 2 stands of 2nd class Line Inf @ 2 pts = 4 pts.
10th Alabama Infantry = 2 stands of 2nd class Line Inf @ 2 pts = 4 pts.
6th South Carolina Infantry = 2 stands of 2nd class Line Inf @ 2pts = 4pts.

1st Carolina Cavalry Company = 1 stand of Cavalry @ 1 point.
Company C, 2nd Virginia Cavalry = 1 stand of Cavalry @ 1 point.

Georgia Battery, Sumter Flying Artillery = 1 stand of Light Artillery @ 1 point.

Here are the opposing armies ready for battle;


Notes;

 * You may wish to supply Dismount Markers for the Cavalry. If so, they have no points value, a basic die is rolled for the stand when firing or in combat.

* With regard to the Light Artillery, I dont know if these Batteries had the equipment to be true Horse Artillery given supply problems of the armies in the west. Therefore these guns can only move two squares in any direction.

* You can use the "Regimental" style movement I set out in a previous American Civil War blog or, if desired move the stands individually as normal. I have read that formations suffered from a lack of senior Officers which led to confusion within and between friendly units during a battle. More often it was down to the individual bravery of soldiers on both sides that would lead to the success or failure in battle.


The battle;

* The Confederates move first and fire first on the first Game-Turn.

* From Game-Turn 2 until Game-Turn 8, both sides will throw a die to determine who gets the Initiative Point for that Game-Turn.

* If you play this Game solo it’s best to stick with the basic 2-player Game-Turn sequence.

* As this battle is in the Western Theatre all ranges are for smoothbore weapons. Again I am basing this assumption on supply problems.

* The winner after eight Game-Turns, will be the side that suffers the lower casualties. Once both sides discovered each other, neither side was prepared to back down, although the Confederates did so after their waggons were safely away.


* If the Confederates loose the higher number of stands they can force a draw if they can get a waggon into Dranesville and back to the Confederate base line by the end of Game-Turn 8.

* As you can see in the battle set-up picture above, the waggons are off the road. The waggons can start their move from the first two squares at the Confederate base edge. The waggons cannot move through wooded areas.

CREDITS;

The figures are a mix of mostly Miniature Figurines and Peter Pig with some Essex Miniatures. The waggons are Peter Pig.

The buildings are Peter Pig. The hills were made by Brian at Essex Miniatures. Two are home made.  Most of the wood 0utline bases are from S and A Scenics. The trees are from various manufacturers. The roads are made from thin cardboard.


The square figure stands are made from picture framing cardboard. The round mdf command stands are made by Minibits.